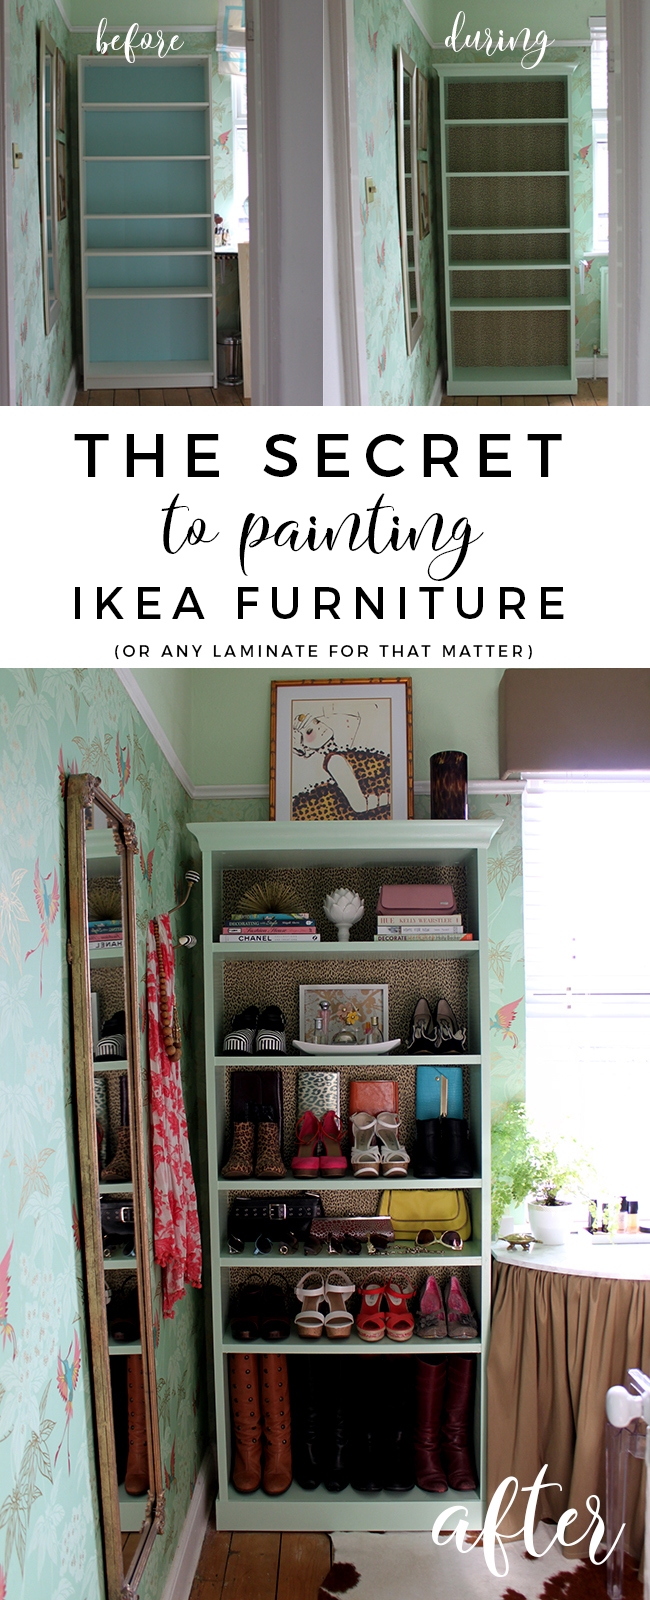
I think nearly every time I’ve shared a post where I’ve hacked some piece of Ikea furniture, I’ve had questions over email and social media about the best way to paint it. Most Ikea pieces are really inexpensive because they lend themselves so well to personalisation and you’ll never feel quite as hesitant to try your hand at DIY on something that didn’t cost you hundreds. On the other hand, it also means that a lot of these pieces are laminate – great for keeping costs down, not so great for painting. Laminate can not be sanded down first to create a ‘score’ – that rough surface that allows paint to adhere to, making your furniture a little more durable for everyday use. Even if you use a primer, you’ll still find once it’s painted, it will easily scratch because the primer itself doesn’t stick well to laminate either. Luckily, I’ve learned how to paint Ikea furniture – and any laminate really – quite easily and it’s made a huge difference in terms of how well my pieces wear.
So what to do?
Well, as you may know, my other half works in the car industry and has done for over 20 years – he paints cars for a living. Some of the cars he works on are utterly ridiculous – Ferraris and Aston Martins mostly -but these are cars that are worth hundreds of thousands of pounds and so his experience with painting really comes in handy when it comes to DIY. I know that sounds insane but you’d be surprised the things we’ve tried and ended up learning in the process of doing up our home.

One of those little tips we’ve learned was that laminate is essentially like a plastic. It’s nice and smooth but doesn’t act like real wood does. When he paints the plastic parts on cars, he uses a spray-on adhesive promoter* which acts as a bond between the shiny smooth plastic and the primer.
And this, my friends, is the secret to painting Ikea furniture or any laminate for that matter – that thin layer that sits BETWEEN the primer and your laminate. Think of it as a primer for your primer.
Where do you get it? Well, any auto shop will carry it (if you are in the UK, try Halfords) but you can even get it on Amazon – here in the UK *, here in the US. Yes, this is meant for cars but we’ve used it now twice – on the Billy Bookshelves in my dressing room and again for the desk in my office (which was laminate).
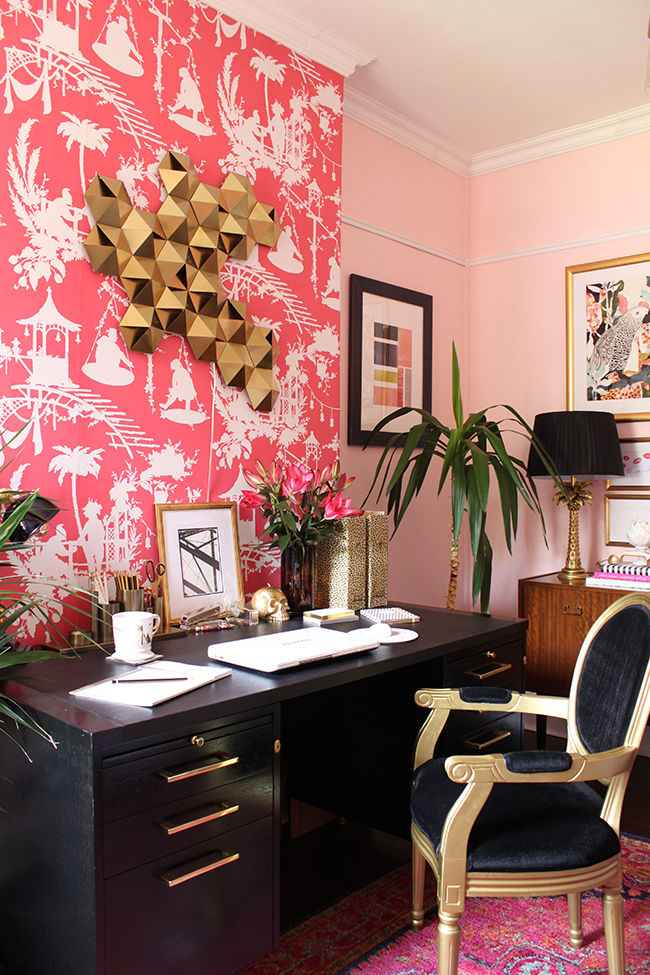
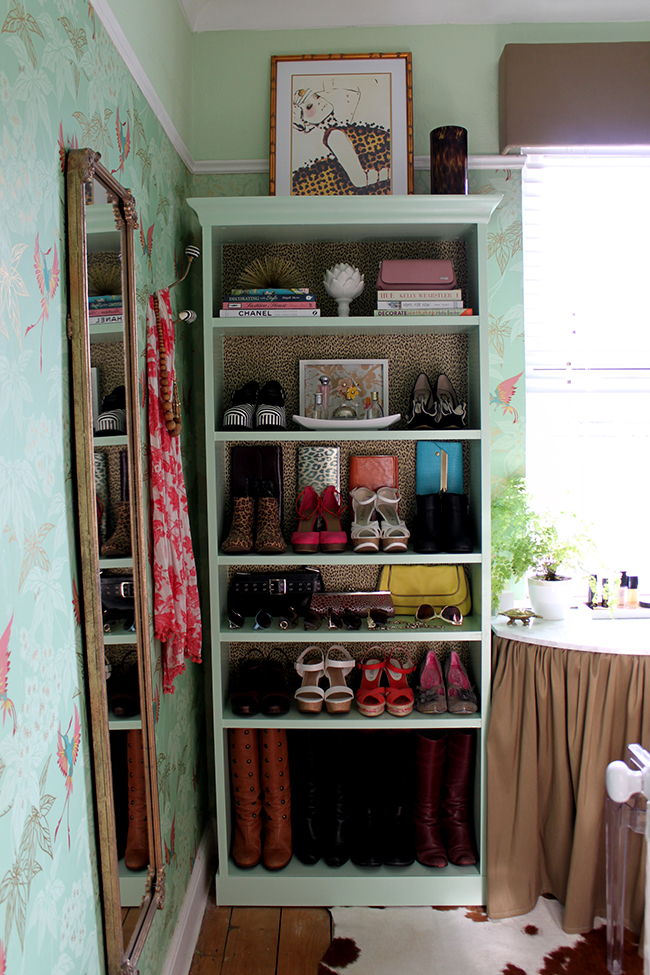
The Billy Bookcases were done over two years ago now and there is not one scratch or mark on the surface even as I remove shoes, bags and various things from the shelves every single day. The desk was done well over a year ago and despite daily use, again, the finish has held up beautifully.
The other thing I would recommend especially for a piece that will get lots of wear (so things like table tops or shelving) is an oil-based paint. Oil-based paints are more hard-wearing than their water-based counterparts and can stand up to a lot of abuse before they start to scratch. You’ll know if the paint is oil-based if on the back it says to wash your brushes in white spirit or paint thinner rather than water.
So here are your steps:
- Spray on the adhesives promotor
- Wait 20 minutes or so for it to become tacky
- Paint with primer
- Wait however long it tells you in the manufacturer’s instructions
- Paint with your final oil-based paint
- Follow manufacturer’s instructions for the recommended amount of time before applying your second coat
- Leave for a few days to fully dry (I normally wait about 5 days before using)
If you take your time and follow these steps, you’ll be left with a perfect finish on any Ikea piece or laminate furniture that simply won’t budge.
Will you be painting any IKEA furniture soon? I’d love to know if my tip helps!
*Please note, this method is only recommended for IKEA furniture with a laminate finish. If your piece is made of wood and not laminate, then sanding, priming and painting will give you a better result. Always read the label of anything you use and follow manufacturer’s instructions. Always use any spray products in a well-ventilated area. Basically, just use common sense.


Great idea! Thanks for posting that one :)
This is SO useful to know, thank you!! I’ve painted laminate furniture like wardrobes using a shellac primer first and a varnish at the end which works really well for me but I haven’t been brave enough to try painting a heavy-use laminate surface. I’ll definitely try the adhesive promoter next time!
Thank you, you are such a star sharing such a great secret! I have always used Zinnser Bin with the shellac as my primer on all my IKEA laminate and an oil based paint colour, it’s held up well, however, you do get the odd ding here and there. Now to find something else to IKEA hack!
Please release a book with all these tips in!
This is genius! Thanks for sharing this nugget of DIY wisdom with us all! xx
Great! I’m forever toying with the idea of painting my old ikea stuff and now i’m one step ahead of the game. Cheers for sharing!
what a gem. I have an old dvd cabinet that I have wanted to give a mackenzie-childs makeover however never had the guts to try on laminate….. Bewdy Bottler……..
How do you paint your pieces? Roller, brush, spray?
Thanks for all the tips!
Hi Camille, it really depends on the piece and what your final topcoat will be. For the shelving unit, I used a brush for the smaller detailed areas and a roller for the shelves themselves to get a smooth finish. If you are using an oil-based paint, they do tend to ‘settle’ and smooth out a bit so you don’t end up with brush strokes. For the desk, we used spray paint. I think for a more rustic finish, a brush would be fine but you may want to use it in combination with a small roller as well for a smooth finish. For smaller pieces you’ll be fine with spraypaint (I quite like Rustoleum as a brand!). Hope that helps! xx
That was so helpful! Thank you for the detail. We are painting our ikea kitchen cabinets (they came with the house) so it sounds like a roller/brush combo is the best. Thanks again!
No problem – Best of luck with it! xx
I was just wondering if you painted you kitchen cabinets yet. I have IKEA cabinets that I want to paint and would love to know how yours turned out.
We never ended up doing it. I did a test run on an ikea bathroom vanity and it was so frustrating, I decoded to leave the kitchen until we can replace the cabinets.
Thank you so much for sharing this tip. Looking at two Ikea pieces that need a makeover. Very excited for dryer weather to try your advice.
Thanks Kimberly, great advice. When I have been to car boot sales, or charity shops, there have been piece’s there that I liked the style of but not the colour or finish, so now i’l know what to do. xxx
Thank you – this is great information!
This post comes at the perfect time for a project I’m working on that involves painting Ikea furniture. THANK YOU for sharing, Kimberly! :)
I love, love, love your blog. A fantastic mix of top practical tips for everything around the house, interspersed with styling inspiration and real life makeovers.
My house is certainly looking much nicer, especially with the finer details since I found your site.
Know I also know how to prettify my ikea hacks :-)
Fabulous work Kimberley !!!
Great tips but this stuff is highly toxic both to skin and inhalation. You really shouldn’t promote this stuff without a hazards warning. You MUST wear gloves and a proper respirator, not just a dust mask.
Any item used for DIY will have advice warnings on the product, always read the label. DIY comes with all kinds of risks, but great savings and reward can be achieved. Power tools are the most dangerous, but it’s not necessary to keep telling people that.
If someone is not happy using something then they should pay a professional to do it.
Yay you are finally sharing “the tip”, I love it.
This is so helpful, thanks! I was wondering, do you use a specific kind of primer after the adhesion promoter? Should this also be oil-based? Or for a specific material? Thanks!
Hi Dionne, just use whatever primer works with your final coat. So if you are using an oil-based paint on top, use an oil-based primer. If it’s emulsion or water-based, then use a water-based primer. xxx
This is a great! Thank you. Do you sand the piece at all before you start?
HI Annette, No, you definitely don’t want to do any sanding! Laminate is very very thin so you’ll only end up scratching it. The adhesive promoter will do the job of a sand in this case – it’s really easy ;) xx
Thank you for this tip and for the link for the product!
Hi Kimberly, thank you for this tip. I was just wondering, when you say it goes tacky, how tacky do you mean? Concerned that the finish will not be smooth if the paint is going on to a sticky surface…
It’s not that sticky like glue or anything, but if you put your finger against it, you’ll feel a slight bit of resistance. It doesn’t affect the finish at all and your brush won’t stick to it if that helps :) x
Hi Kimberly, a brilliant article and thank you for sharing!
Can I please ask, would one can of the spray on adhesive promoter be enough for 1 Billy Bookcase? Also what brand of oil base paint did you use? Trying to work out my shopping list and costings before I commit.
Really look forward to hearing from you. Thanks, Brenda
Hi Brenda, you should only need one tin of the spray on promotor! The other products I used are in this post:
https://www.swoonworthy.co.uk/2014/09/dressing-room-mini-makeover-my-ikea-billy-bookcase-hack.html/
It was the Dulux trade paint and primer from Ronseal – you’ll see the picture there! Hope that helps ;) xx
This is great! I am trying to determine if I should pursue a sanding option for cabinets or take on the adhesion you’ve had success with. It seems that the doors for the sektion system (http://www.ikea.com/us/en/catalog/products/50348357/) are made of the same material of the Billy Bookcases you’ve worked with here, yes?
Hi Roger, yeah I just checked the product description and it says under the ASKERSUND: “Product description: Particleboard, Polypropylene, Foil, Melamine foil, Foil, Melamine foil” – this means they are laminate. If you sand that, you’re going to go right through it. It’s not wood, it’s simply a very thin veneer. So definitely use this method of the adhesive promotor for this one! Hope that helps and good luck! x
Why why why didn’t I see this before the disaster I painted !? Hoping you could offer a solution for my dilemma. I purchased 2 IKEA twin beds with drawers underneath. The drawers were black and the bed frames white. I lightly sanded the laminate drawers and then applied a primer and two coats of a latex paint that did not match. Now they are tacky, sticky and don’t match the bed frame. I know I have to start over. Can I apply this clear product on top of the horrid drawers as they are or do I need to attempt to remove the paint first? Any suggestions would be greatly appreciated!
Hi Wally, Oh dear! Yeah, that’s not good. I spoke to my other half (who is the paint expert around here) and he said he wouldn’t recommend using the promotor over it. If it’s tacky, you are going to have to remove it first. You can try use paint thinner (you can get it at any DIY store), just be careful not to get it on anything else as it’s pretty potent stuff. Sorry about that! Best of luck with it! x
Thanks so much! I will try to tackle this soon and try to fix it.
I’m getting ready to paint some shelves which are probably like laminate. Do you use oil based primer or water?
Hi Jen, it depends on your final paint – if it’s a water-based paint, use a water-based primer! If it’s an oil-based paint, use an oil-based primer :) Hope that helps! xx
Hi Kim,
Loved this post thank you so much for sharing your tips! I’m thinking of painting my IKEA Norden Gateleg table and it’s supposedly solid birch with clear acrylic lacquer. Wondering if painting this would require a different method or whether I stick to your method above?
Hi Veronica, so pleased you found it helpful! So I had a look at that particular table and you might actually need to use a couple different methods on it!
Here’s the breakdown:
Table top/ Drop-leaf: Particleboard, Acrylic paint (you can use my method)
Drawer front/ Drawer bottom: Fibreboard, Paint (you can use my method)
Drawer side/ Drawer back: Particleboard, Foil (you can use my method)
Underframe: Solid birch, Paint (sand down well to completely remove gloss and give it a score, prime and paint as you would normal wood)
Basically if it’s real wood, you don’t want to use the method I describe in my post. You’ll treat it as any other piece of wood and sand it down and prime it with something suitable for wood. For the other areas, however, because they are particleboard, you won’t be able to sand it. So only on those areas will my method should work for you!
Hope that helps and good luck! xx
Hi Thanks for a fantastic post. Please, can you clarify if you lightly sand Ikea laminate before applying adhesives promotor or just spray the adhesive onto the furniture as it came from the shop floor? Thanks so much for your time.
Hi Oli, no, as I state at the start, you can not sand laminate. This is what the adhesive promotor does, create something for the paint to stick to. Hope that helps! x
can you recommend a primer or paint brand? total novice here!
Hi Kimberly, handy tips! I like your style. The IKEA employee who helped me suggested using a primer and acrylic paint. I think I’ll follow your advice re: adhesive spray & primer. However, as I want to paint a light-brown IKEA wardrobe (think it’s Malm) white to match a few items of Brimnes furniture do you think acrylic paint is a better option or to stick with an oil-based paint? Thanks :)
Hi Maria, Thanks so much! I think any furniture that will be used quite frequently is better with oil-based paint (if you can find it – it’s getting harder to source!) only because it’s more hardwearing in my experience! Hope that helps! xxx
Yes, it helps. Thanks Kimberley! xxx
Hi!
I was wondering if a paint for plastic would work? I have an extremely small area to paint, I got scorch marks from a candle on my furniture and just need to cover it.
Ellie