**UPDATE!** Click here to see the worktops installed / Click here for how we finished the joins / Click here for the finished kitchen / Click here for how our worktops are holding up one year on
So I promised an update on the kitchen this week and whilst it’s not as far along as I wanted it to be, I did want to let you know what’s been happening on it.

As I mentioned in my post on Friday, things went a little pear shaped in terms of the worktops – or at least in terms of their installation. I wanted to share a little bit about my experience in case anyone else was considering them for their kitchen design as well as get you up to speed in terms of where we are in our little kitchen upgrade/mini-remodel. I broke it into sections because it’s a wordy post! Yeah, sorry, I know some of you like pretty pictures (because come on, we all do) but well, I’m a talker and I needed to get it all out of my system! ;)
Why Minerva Worktops?
After endless YEARS of deliberation, I finally decided to go with Minerva’s Carrara Marble style acrylic worktops.
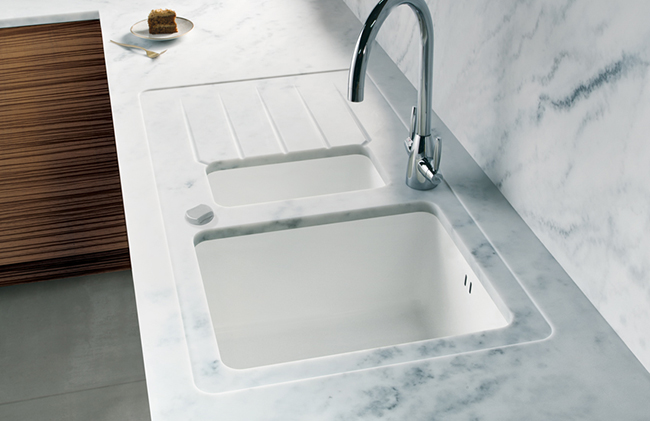
What my worktops will look like eventually if they ever get installed. Except of course with gold sinks and taps! Oh and marble effect subway tiles… and I’m just having drainage grooves and not the surround… but you get the idea!
They are similar in some ways to Corian and looked very similar to actual marble without all the hassle of upkeep. Similar to Corian, they are made with acrylic but unlike Corian, they are solid all the way through (Corian is a layer of acrylic over a timber core so there are risks of warping there that Minerva worktops don’t have). Similar to laminate, they are pretty impervious to staining or etching and unlike laminate, if you do get a scratch, they can easily be buffed out as the pattern goes all the way through the surface. They are super hard-wearing as well (which I really liked) and have a beautiful soft finish similar to the real thing. I was sold very quickly on them as soon as I got the sample.
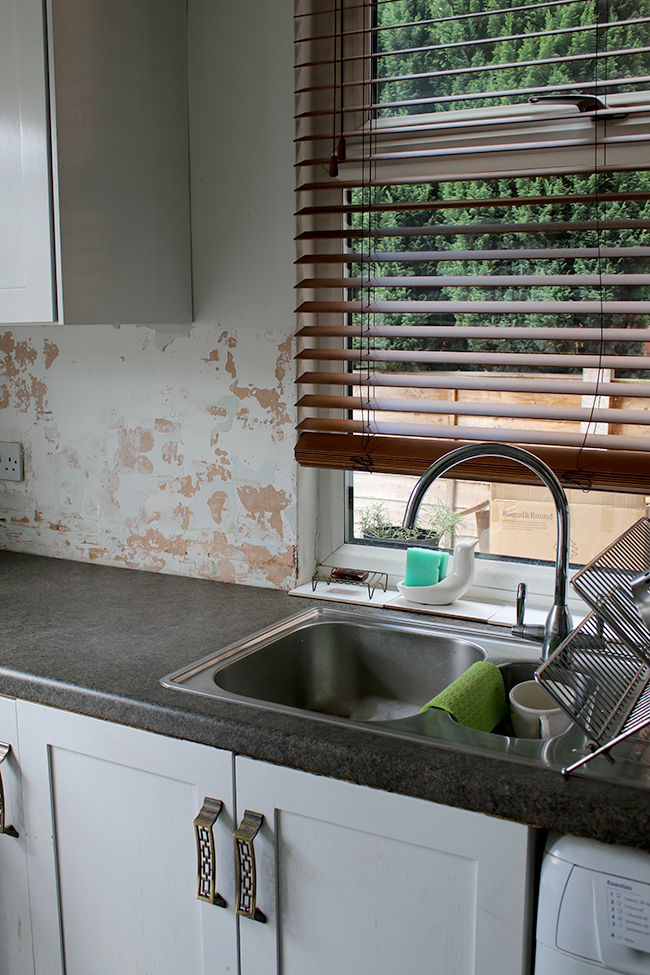
The current situation with the sink and windowsill – notice I have tiles that simply sit on top now because underneath it’s just a crappy piece of ugly plastic.
They weren’t as cheap as laminate or wood, of course. For 2 lengths of 3 metres plus another small section for installing into a windowsill and the joining glue, I paid around £1800. I sent a detailed drawing, all my measurements and photographs to the company I purchased them from and they recommended the sizes of worktop I would need to order based on this information. The worktops would then be cut to size and seamlessly joined by my installer. So far, so good.
The Search for The Installer
I then went on both Rated People as well as My Builder to get quotes for the job and to find a trustworthy tradesman who had experience in fitting acrylic worktops. This is where things started to go wrong. On Rated People, the job was ‘viewed’ over 500 times with not a sniff of interest. Not one tradesmen wanted to quote the job despite my estimating it around £500 (which is quite high for a worktop install but I wanted it done right). It was the same story on My Builder – it was viewed over 300 times and no one came forward to quote it. I tried rewording it, adding additional information and changing out pictures with no luck. Why did no one want this job?? Minerva themselves were unable to provide recommended installers. Finally, after a few weeks, one chap (let’s call him Craig since that was his name) from Rated People gave me a ring saying he was experienced in fitting these kinds of worktops and he’d be happy to quote the job at £300. It was his first job on Rated People and he was looking for reviews to build up his business.
A little reluctantly but with no other real options, I decided to go for it. I ordered in the worktops to the company’s recommendations based on my measurements and drawings and they arrived around a week and a half later. The installer was scheduled for Monday, 25th July so I was incredibly excited that weekend, clearing the kitchen to prepare for their installation early in the week.
The Install That Wasn’t
On Sunday evening, I spoke to Craig and he said he was having problems with his van (someone stole his catalytic converter and exhaust) and he was supposed to be getting a courtesy van first thing on Monday morning. He hemmed and hawed a bit saying he wasn’t sure what time he was going to be able to get it and would it be possible to do the work on Tuesday instead? I agreed, figuring I could wait another day, no big deal. He said he’d be with me first thing on Tuesday morning. At this point, I’m still feeling quite positive.
He showed up around 10:30am on Tuesday (not exactly first thing), explaining he didn’t get the van until that morning, apologising him and his assistant were late. They then proceeded to pull loads of equipment out their van and into my back garden, while Quito just barked relentlessly (perhaps he knew something at this point that I didn’t?). Once they were set up, they had a look at the kitchen. He sucked his teeth at the fact the worktops weren’t perfectly level (even though he’d not told me we needed to do this and that he’d take care of everything). Then he measured out the worktops I had delivered and said I didn’t have enough to do the whole thing – that we were going to be short by about 20cm of worktops. WHAT. This is the point I start to lose it.
So I gave the company I purchased the worktops from a ring. They said they’d figured I could just do an extra join, using an off-cut to make up the additional needed to ‘save money’ even though this would mean the Cararra effect would be spoiled – the extra join meant the pattern won’t be seamless because it was impossible to match up the pattern perfectly where the joins are. Cue crushing disappointment.
I wish they’d given me the option of knowing that there would be an extra join and allow me to decide whether I was happy with that or wanted to spend a bit extra to have that consistent look all the way across the worktops. They then informed me that if I wanted to order the additional piece so I could have a seamless look, it would take another 10 days at a minimum for manufacture. Even then, there was no guarantee it would all match in colour as they are manufactured in batches and the colours wouldn’t necessarily be exactly the same. *headdesk*
I talk to the installer and after much deliberation and frantic re-measuring, we decide the join could be hidden slightly so it wouldn’t be too obvious so there seemed to be no point in ordering the additional size and waiting even longer and spending more money. Although with all the teeth sucking going on with the fact the existing cupboards weren’t perfectly level, I agreed to paying an extra £100 to level all the cupboards.
By this time, it was 12:30pm and they’d not even started yet. He suggested they come back on Wednesday “bright and early” to get started on the work first thing rather than start the work so late. I agreed again to the delay, knowing I would have to yet again rearrange my own schedule to be home. He said, ‘Could we start at 8am? Is that too early for you?’ and I told him of course, I would be up and ready well before that time. The earlier they started, the earlier they’d finish, right? Despite everything, my worktops would still get installed – not exactly to my perfectionist standards with the additional join, mind you, but still. They’d look pretty when they were finally in and that’s all I wanted. Craig texted me that evening making a suggestion about the join again which eased my mind to the fact that he was at least still contemplating things. I had no reason to worry. Everything was in control.
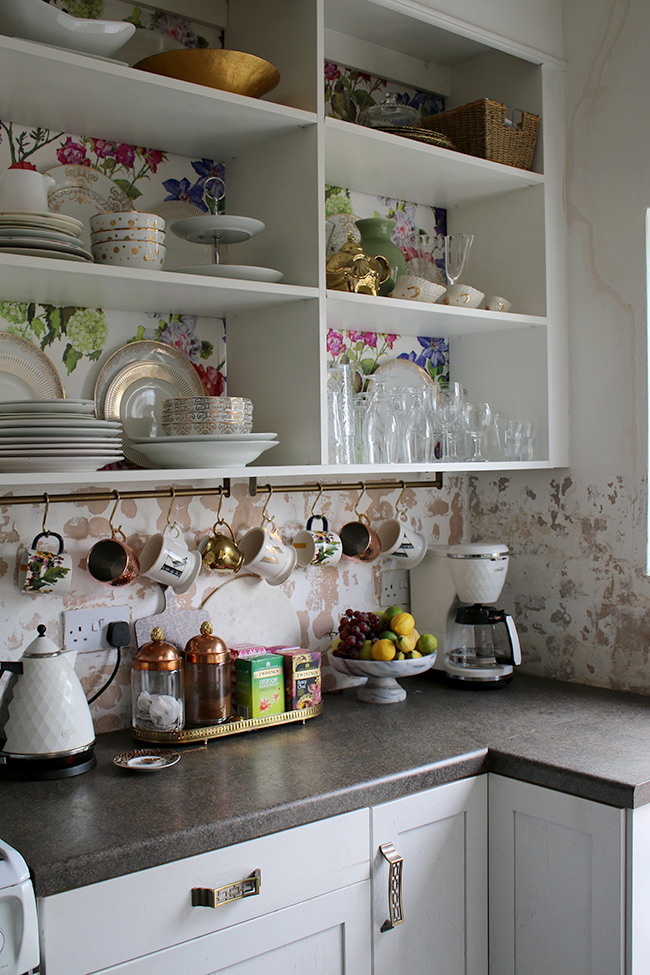
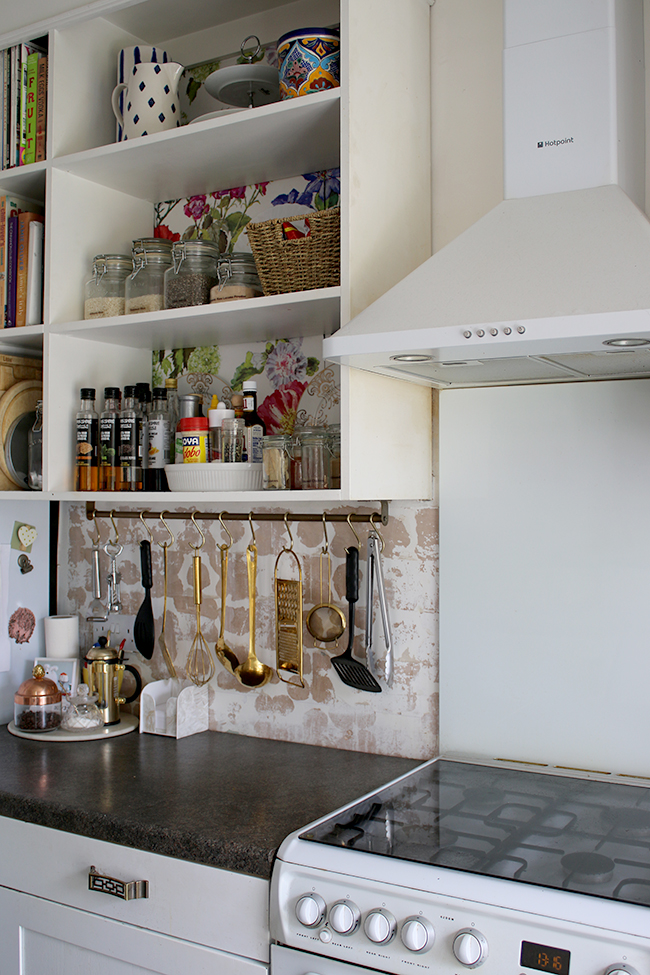
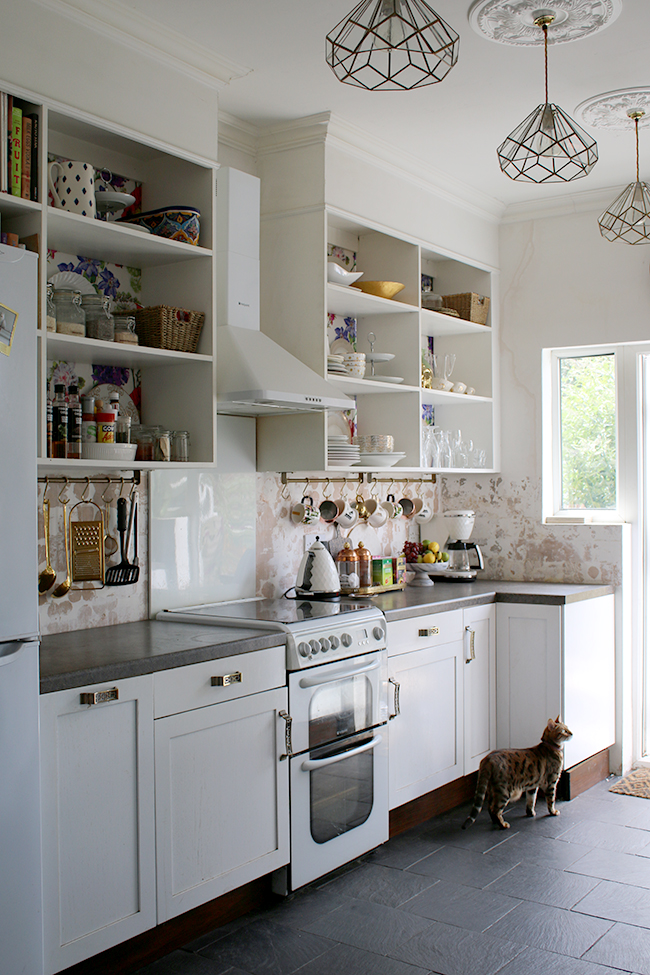
Tuesday evening, Wayne and I decide to remove all the tiles from the walls seeing as there would be mess later to do this anyway so we might as well do it now while the worktops are being done anyway – this is what you’re seeing in all these pictures, by the way. Wayne also dug out a crack in the plaster near the window which you can see above and repaired it ready for when we eventually paint.
Wednesday morning at 6:30am, I wake and shower and start clearing the kitchen again for the install (given the fact that each evening, we still need to use the kitchen so I’m moving things on and off the worktops each night). By 9am, he still hasn’t arrived so I send him a text asking if he’s on his way. No response. Okay, maybe they’re stuck in traffic? I check traffic, it’s clear. Hmmm. By 10am, still nothing. I call Craig. It goes straight to answer phone. Subsequent phone calls go the same way. By 12 noon, I know with a sunken heart, he’s not coming back. Craig never does return my calls. He basically goes AWOL. Everything has gone to sh*t.
The DIY Decision
After much deliberation and discussion, Wayne and I decide we’re going to do this ourselves. It’s not our first choice and I’m absolutely scared to death seeing as how much I paid for them but Wayne has watched all the installation videos on the Minerva website a bunch of times, has ordered in some new equipment (which all in, will cost less than what I’d budgeted for installation) and feels confident.
We intended to do the work this weekend but we realised we had to order in new blades for the circular saw and an additional joining kit so we couldn’t start work just yet. We also need to order in a template for the sink cutouts. DIYing doesn’t come cheap at times but even the extra equipment is less than the £400 I would have paid so we’ll save a bit of money. We’ll level the worktops ourselves and Wayne will have a friend who’s also quite experienced with DIY around to help him out.
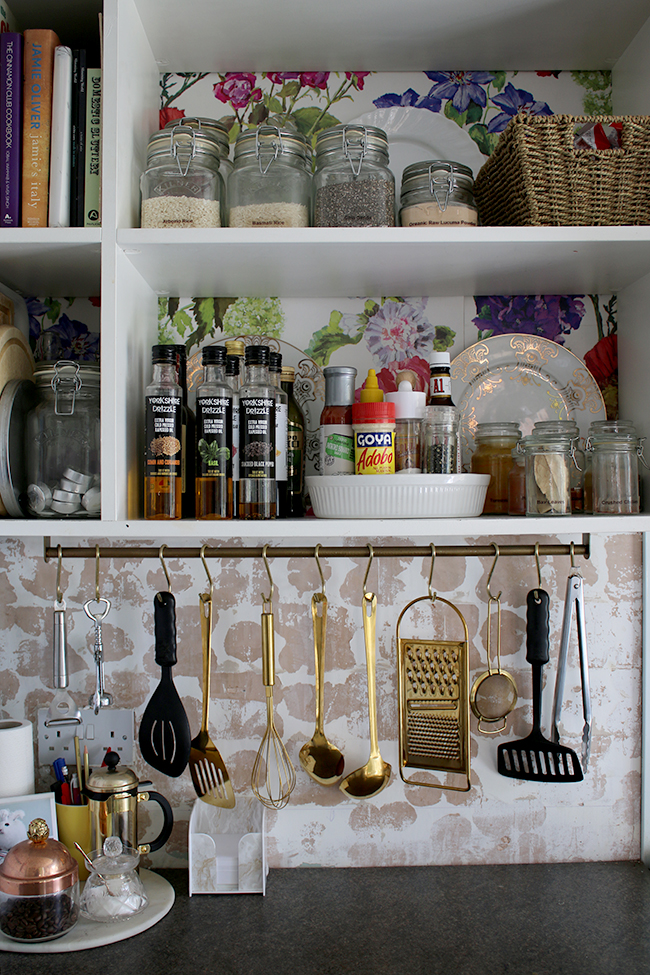
So yeah, we’re going to go for it. This weekend, I spent most of my time trying not to think too hard about how things have panned out so far. I decided to clean every inch of the open shelving (I do this periodically – take everything off, wash everything by hand, clean all the surfaces and re-organise which takes me a good few hours) as well as clear out the clutter from a few of the cupboards. It felt good to do that. To purge things I no longer wanted or needed, to organise things better, to give me a sense of a clean slate, to look forward.
We’re going to try something we’ve never done before and we’re going to tackle it like we do everything else – with a positive outlook and gathering as much knowledge as we can in the process. We’ve done it before, right? So there’s no reason to think we can’t do it again.
Of course, I’ll be sharing the journey just as I always do. Have you had any nightmares on your own kitchen remodel? How did you overcome them? Ever installed a worktop yourself? Go on, share the love.
**UPDATE!** Click here to see the worktops installed / Click here for how we finished the joins / Click here for the finished kitchen / Click here for how our worktops are holding up one year on


I FRICKIN HATE CRAIG. All shit tradespeople will now be officially known as “Craigs”.
WHAT is wrong with these people? How do they make a living? How do they actually get paid? They are always busy and they always seem to have money, but they hardly ever turn up. HOW??
I totally feel your pain hun and i’m not surprised you’re pissed off. Rargh!!
I think between you and Wayne, you will do a fab job of getting these worktops fitted. The end result will be just right, because nobody ever does as good work in your home as you do yourself. Good luck. We’re all rooting for you xx
Hahaha! I like the idea of calling all shit tradesmen ‘Craigs’!! Honestly I have no idea how they make a living when they are just a law unto themselves. Pricks! That is so true though about working on your own home – fingers crossed we manage to make a success of this!! Thanks for the support lovely! xxx
Craig? You’re a fucker. Ha! Sorry, my lovely, and by all means delete this, but it makes my blood boil when people, okay TRADESMEN, let people down like this. Why are stories like this so common? And why can’t Minerva find you a recommended installer? If there is not a single person in the whole of Manchester willing and able to do the job, then they need to be aware of the situation and inform potential customers first. Yep, I’m cross for you.
Rant over, I know you and Wayne will do a beautiful job anyway, just such a shame you’ve been so royally screwed about in the lead-up.
Xx
Hahaha! If there’s a time to use the word ‘fucker’ on a blog – this is it!! I couldn’t believe how hard it was to find someone to do the work and I’m still completely clueless! Thank you for being cross for me, I’ve been fuming for the last month about all of it so ready to just let it go (let it gooooo) and concentrate on getting it all done ourselves. Let’s hope it’s all smooth sailing from here, eh? *goes to hide in closet until it’s all over* ;) xxx
You guess must understand how the industry works before you wonder why no one wants to do it
1) you messed him around by having no level cupboards etc
Everyone knows it has to all be level
2) you paid £1800 so say he charges £500 like you first stated and he makes a mistake the cost is £1800 so this puts a lot of people off
3) they sell these as seamless worktops but they are not always 100% seamless but near seamless you can often see joins if there is a pattern then the customer won’t pay
Hard work for no reward
I imagine he found an easier job – however he should have told you and not ignored you this let’s all traders down
In my opinion most jobs the labour is almost equal to materials but with little jobs like worktops etc this is not the case
Hi Russ, I appreciate your response from a different perspective. However, I disagree that ‘everyone knows it has to be all level’ and that I ‘messed him around’. I find in a lot of industries that something becomes so ingrained and so well accepted, that it’s natural to think everyone has this knowledge. They do not. I had no reason to believe that the existing cupboards weren’t already level so I certainly wasn’t messing him around in any way and if it was important, then he should have mentioned it. He told me he’d take care of everything when I asked if I needed to do any prep so surely, if that was the case, he should have said something and not assumed previous knowledge.
Second, if there is a risk of mistake, then they should charge more for the job. He quoted £500 to me. If this was not enough, why not quote higher? This is not my problem, it’s his.
I understood there might be seams and this was not in any way blamed on the would-be installer. I felt the company I purchased the worktops from, however, should have made it clear there would be an additional join that wasn’t actually necessary had they given me the option.
Finally, I agree that whatever his reason, I should have been informed instead of just left waiting and ignored. In the end we ended up fitting the worktops ourselves and it went really smoothly and wasn’t that difficult. I’m very happy with the result, the seams are not terribly noticable, we saved money and all’s well that end’s well.
Again, thanks for your comment.
God, you poor thing! What an absolute nightmare. Wouldn’t you just rather someone was honest and said they couldn’t do it then mess you around? I would be like you though and decide to do it myself so I hope it all works out. I’m sure it will though. Look forward to seeing updated posts!
Oh absolutely! If he had come over and said, ‘Listen, it’s not what I’d expected / I’m too busy / I’m no longer interested’ I would have been frustrated, sure, but at least I wouldn’t have wasted so much time. Who knows how people think sometimes! Thanks so much for the support and fingers crossed it all goes to plan from here on out – ack!! ;) xxx
Aw, what a sad story but I’m sure you will overcome. Your home is an inspiration & I look forward to seeing the lovely (cos they will be) kitchen tops when you’ve finished.
Aww thank you Alison for the show of support!! I can’t wait to see them all in myself and this sorry nightmare be over ;) xxx
I know how long you’ve been dreaming about and weighing options for new counters and I just hate this whole situation for you. Sending good vibes to Wayne for install time, and to you for all the stress.
Aww thanks darling! I WILL HAVE MY PRETTY WORKTOPS EVENTUALLY DAMMIT! Fingers crossed it all goes to plan!! xx
No wonder we prefer to do stuff ourselves if we can, I HATE having to rely on tradesmen! We too had a nightmare with our kitchen worktop though ours was (thankfully!) only a cheapy laminate one.
We had fitted the kitchen entirely ourselves but my husband didn’t feel confident with joining the worktops so we decided to get someone in to do that bit for us. Turns out not many kitchen fitters want to do just worktops so my parents asked a builder who was doing some work for them if he knew anyone and he said yes, he could fit worktops so we arranged for him to come over to do it though he had to fit it in around his building work during the week so could only do weekends.
The first weekend he had arranged to come out he didn’t turn up. My husband had words, asked if he really wanted the job, he was full of apologies and excuses and promised faithfully to come out the following Sunday-meaning our worktop was out of action for the whole week.
Second weekend he DID turn up though we ended up wishing he hadn’t. Turns out he hadn’t got a clue, he was at our house for nearly 7 hours(!) and in that time installed just one piece of worktop (badly) then wrongly cut a second piece. He swore he could put it right and would come back the following weekend. In the end we just asked him to leave and wouldn’t have him back. The two pieces of worktop weren’t salvageable, we had to order two more and wait for delivery of those and in the end finally found a kitchen fitter willing to do the job for us but had to wait another week or so until he was free!
We had no sink and had to use the utility one, had to cobble together an old piece of worktop to temporarily install the hob into. It was completely miserable and cost us far more in the end than we’d budgeted for.
So you’re much safer getting Wayne to do it, I’m sure! Hope all goes well. x
Wow, Bella! What a nightmare! I hope that your kitchen is lovely now though!
Thanks, Anna, we were really pleased with it in the end though this was 7 years ago so now I’m at the stage of wanting a new kitchen. I’m just not sure I can go through it all again though! ? x
Oh my goodness Bella – what a horrible nightmare!! You really have to wonder about these tradesmen, don’t you? Even when they come recommended, you just don’t know what you’ll get. Far easier doing the work yourself if you can. We were in exactly the same position as far as being pretty confident with everything except the worktops but well, when push comes to shove, you just have to do what you can. Fed up with dodgy tradesmen as well now, think we’ll end up going the DIY route on the tiling as well (at least we’re experienced with that one!). Silly me thinking it’d be easier to hire in help, eh? ;) I hope you have your lovely kitchen now at least! Thanks for sharing, I definitely feel better knowing I’m not the only one ;) xxx
What an absolute nightmare! Craig – what a *#%£! I am certain that you are going to be far better off DIYing it, and I hope it all goes smoothly.
I’d be pretty annoyed at Minerva too – not giving you the option of ordering a longer one or even mentioning it?! I would be after them replacing it with the longer piece and just paying the difference in cost or possibly not even due to the inconvenience! When you’re spending so much money that really doesn’t seem a forgivable assumption for them to make.
x
Aww thank you Anna and yes, the air has been plenty blue around here with all this hassle! lol It wasn’t actually Minerva I’d ordered the worktops from, it was one of their retailers (I should have ordered directly really but hindsight is always 20/20 eh?). And I probably could complain but I’ll be honest, I just want it done now and I’m so tired of waiting! Hopefully the join won’t be too obvious – but no, you are right, it was a ridiculous assumption to make. I was already spending a lot and it would have been nice if they’d at least given me the option. So frustrating! xxx
I just don’t know why tradesman say they can do something when they clearly can’t! The guy we hired had actually done some decent building work for my parents, so why on earth he claimed he could fit kitchen worktops when he clearly couldn’t is beyond me!
So you’re definitely not the only one, Kimberley, I’m sure Wayne will do a fabulous job just as he has with everything else in your home! xx
Sorry to read about your tradesmen nightmare, all of us who have hired people to do a job & then hold our breath until the job’s done can relate. Unfortunately there are a lot of unscrupulous people out there & the north of England is notorious for it’s share of “cowboys” as my family refers to them. My brother who lives in Chorlton hired a guy to do some yard work, my brother is such a sweetheart & trust everyone; he paid the guy up front & you guessed it – the thieving bastard was never seen again. I live in Toronto & felt like jumping on a plane & finding this low life before he ripped someone else off. I suppose we should take some responsibility when hiring folk & start asking for references or photo’s of work they have done, that way hopefully their clientele will quickly dry up & they will be out of business. Sorry to ramble on, my cuppa tea’s gone cold!!!!
Bastard Craig. I’ve had a few of those in my time. Let’s call all shit architects Kieran (for that was his name) and what about the new chimney liner I needed – that Craig was a Paul (if you get my drift) who took £1800 for the new flue and told me the cracked firebrick would be fine and he could repair it and that would be the whole cost of the job. He then disappeared off the face of the earth. For two weeks. When I finally hunted him down he said he would be round the next day…. Yeah right.. When I started phoning fireplace shops they told me they would have to rip the entire fireplace off the wall and I would have to buy a new surround and fireback and it would cost around £1,500. If I had known that I wouldn’t have started on the open fire thing in the first place. Eventually my lovely builder came up with a solution for £600. Still furious with Paul/Craig.
Yeah, our disappointing contractor was Tom. Even with good references we had a nightmare experience. You actually got lucky, usually first they do demolition, and then they disappear.
I have a theory. I think that many contractor/tradesmen type guys have ADHD. Now, nothing against people with ADHD – some of my nearest and dearest have it, and this can be a great profession for some of them. It offers something new all the time, they get to be creative, to work with their hands, etc. Unfortunately, if they haven’t figured out a way to stay organized (and realistic) or don’t have a wife or secretary or someone who keeps them organized, we end up with — CRAIG!!! And I personally have experienced a number of people like this who seem to do that thing your retailer did, making a decision on their own instead of asking what you, the client want. “Oh, you didn’t want all the trim and mouldings painted the same green as the walls?” “What, I thought you’d like it better if we went ahead and cut the holes in the tile for you.” Sheesh! Yes, I believe you’re better off doing it yourself. Good luck!
I hope you have him that review he has hoping for! Sorry buddy, not growing your business that way!!!
So sorry to hear about your experience with these worktops – what an absolute nightmare! I’ve been there with similar tradespeople and its heartbreaking when you’ve been waiting (not to mention wasting your own time when they don’t bother showing up or returning calls). I’ve never understood why people can’t just be honest and tell you they’re not coming back! And the worktop company should never have just ‘assumed’ you’d put in an extra join – especially as they advise on the quantity and measurements you need! Very poor form indeed. Very best of luck for the install – you’ll both do a fabulous job I’m sure.
It’s even worse than I’d imagined from what you’d said!!! And that business about the extra join – why on earth would they make that decision for you?! It’s your choice as to whether you want to save money or are prepared to pay extra to get the look you want! I can imagine how gutted you were!! It’s good that it sounds like you have a plan on how to deal with it so it’s not too noticeable. That is really infuriating, though, then coupled with that twat Craig…!! I really feel for you on all this!
Good luck with the fitting – keeping my fingers crossed for you! xx
Life is stressful and complicated enough without chuffing wankers like Craig. I am so glad that Keith is really handy, i think i’m on my third work surface, and he’s fitted them all. I have every faith that Wayne and his friend will do an excellent job.
Chin up flower, keep being positive XXXX
That’s the kind of guy who goes out with someone and then breaks up with her by just never calling again. Jerk!
I’m going through remodeling woes and I just feel defeated and exhausted. I’m sure Wayne and his buddy will do a much better job than anyone else. I’m angry for you about the extra join. Never assume. I would be mad every time I looked at it.
I suppose that I could have missed this somewhere —
but Craig left all his equipment? Did he ever come back for it?
And how do you know that the cabinets weren’t level – for sure?
And did you mis-measure something or was it the Minerva’s fault for the 20cm error?
You don’t need to answer these questions–as much as they are food for thought…
I hope that you did not pay Craig or Minerva in advance, because someone certainly owes you some money, if not for the lack of installation, then for the 20cm error or the time that you lost (not doing other things that you had scheduled) as a result of all this. And if you paid for it with your credit card, dispute the charge, because they always side with the consumer in cases like this.
Now, I have never used a contractor (I am only DIY) so I have no experience with such nightmares. But IMO I think that there is one mistake that you made (and probably anyone in your situation would have done the same) — you finished the job for the incompetent Craig. I understand that you want your counter tops but DIY-ing just reinforces that it is OK to flake out in the middle of a job. And it’s not.
All Craigs need to be taught that this is unacceptable behavior. I think that even the manufacturer should enjoy a little suffering too. If they want someone to buy their products, then it should be up to them to ensure that the installation is done by professionals that they approve of. That’s what an ethical company would do. (I know there aren’t many of those around.)
You probably don’t want to mess with suing someone, but at least consider disputing the credit card charge (if you paid that way) — debit/credit cards should allow for disputes as well. Also, complain long and loud on all the social media that you can. You never know when it will work to your benefit.
Ahh thanks for your thoughtful response, MissC! Okay to answer your questions: Craig left one piece of equipment (a big square bit of metal, no idea what it’s for) and he never came back for it so I’m assuming it wasn’t important to him. I know the cabinets weren’t level because we put a spirit level on them and they were out so yeah, they need leveling or else the joins won’t line up perfectly. I didn’t mis-measure and it wasn’t Minerva’s fault. I ordered the worktops via one of their retailers and they recommended the sizes to order based upon my drawings but assumed I wanted an extra join when I didn’t. I had already paid for the worktops and waited a few weeks for them to come in but I hadn’t given Craig any money so there was no loss there except for my time. There’s little I can do about him – I don’t want him back in my house to finish the job and I’ve left a very poor review for him on Rated People so that others wouldn’t be let down the same way. I’m not sure what else I can do on that one to be honest seeing as I’d not paid him at that point. I could probably press things with the company I bought the worktops from but I’ll be perfectly honest – I just can’t be dealing with more delays and I can’t be dealing with any more stress so I’m going to let it go. They thought they were doing me a favour (clearly I would have preferred they let me choose whether I wanted a favour or not) but having to get new worktops at this point will just draw the whole process out further and I’m not willing to do that for the sake of a join that will be mostly hidden, it’s just not worth the agro. Hope that makes sense! xxx
I think that is how these bad people win (in situations like this) — you are so stressed that you just want the thing done so you are relieved to do it yourself….I look forward to seeing another beautiful kitchen. I found you because of your kitchen on Apt Therapy.
Wait! My husband is a Craig! We have gotten really brave with diy because of crap contractors and handymen. Like the guy who put in the bath fan thing in the ceiling… And cut the damn hole too big in my drywall. For $200. My Craig always does a great job (I do have to supervise) and if he ever does goof up – I can have a bad job for free.
I am sure you guys can do this. Although – the counter company should not have shorted you. I think they owe you all new matching counter of the correct length. You are pretty lucky your Craig bailed before he made any cuts.
Letting it go is the best sometimes – I just think they should have asked about the extra seam.
Argh, I’d be FUMING! Craig could’ve just been honest and said that he wasn’t feeling confident about doing it, it was out of his depth or whatever. But to go AWOL like that is so wrong. That jerk aside, I feel the company is also to blame. There’s the amount estimation where they made assumptions without discussing with you, and also… how can they not have recommended installers for their product? When you first talked of this worktop, I got quite excited as I can’t afford real stone when I come to do my kitchen in a few years and loved the idea of this acrylic faux-marble product that was so hardwearing. Not sure I’d go with it now unless Minerva have their own installers. Clearly, it’s not a product that the ordinary tradesperson is familiar with. So for people who aren’t DIY savvy like you and Wayne, is this worktop not an option? Because it sounds pretty hard to find someone who can, or wants to, install it.
Good luck with the DIY installation!! Keeping my fingers crossed for you that it all goes well xxx
Homebase supply and fit Minerva worktops :)
Hey, we’re just having a new kitchen fitted and like yourself, having Minerva work tops. Luckily my husband has worked with it a lot and is doing my fitting / installation. He is a boat fitter/ carpenter and woodworking tools are best used on this product I believe. Hope all goes well for you, and as mentioned above, homebase stock Minerva so they should have fitters….. Wishing you all the best.
Thanks Lori! Yes, we did manage to install them ourselves and it went very smoothly!
http://www.swoonworthy.co.uk/2016/08/minerva-worktops-gold-sinks.html/
http://www.swoonworthy.co.uk/2016/08/join-minerva-acrylic-worktops.html/
xx
I have now learnt to do the vast majority of work myself from plastering to electrics. Was forced into it as a plasterer I took to France couldn’t use there plater. He helped put up the false ceilings though and I then sent him home on amical terms. it was for me the beginning of doing my own work. Have now done up a few houses as we move from one to the next. Nightmare nearly happened though when I needed a flat roof done in a hurry as w had a rental to honour and we needed to speed up the final work…hairy times!
The roofer and his mate came round and said they could do it. Next day I looked him up on Google to obtain his phone number, which I had mislaid. I came across a website with his name and assumed it was him. But no it was someone who he had ripped off, threatened etc and whose roof he had ruined! So I dropped him of course. Asked someone locally who I totally trusted who recommended local guy. Job done extremely well and very realistically priced.
The moral of this long winded tale is always ask around for a solid recommendation from someone you know and trust. The web portals ratings are easily distorted and tradesmen who are unscrupulous know how to do it.
Work surface. Had marble put in for £250 only! I did the chap a website in exchange also.
New place now and kitchen worksurfaces have to be put in. I found a firm whose work I have seen in a restaurant and they quoted granite, all fitted and fitted for under £3k incl Vat. And we have quite a large area to cover…..other man made surfaces came up as much! A good find…rest of work I do myself so £3k for a kitchen (+ sink and taps-restore units which are good and high quality-add new wood flooring)
Hiya, I came across your blogs as I was doing some search on Minerva worktops and I am loving your details & honest DIY/ decoration blogs. I am a basic but keen / avid decorator (limited to my house) too.
I have two questions please:
1. Which company did you order the worktop from.
2. How are you liking your worktop please? I came across below FB page where people don’t seem to be happy with it as the worktop is very delicate & is easily scratched / cracked. Wanted to find out how is yours holding up please:
https://www.facebook.com/pg/minerva.worktops/reviews/
Hi, I’ve had the White Minerva with small sparkles – think it’s ice white? For almost a year now- and I love it. No scratches at all- and it can be sanded if this happens. It looks immaculate. My husband uses it in his boat fitting business to do galleys. It’s heavy to fit but very versatile, the company he uses to purchase it is trade only, but there’s plenty of suppliers. Would definitely recommend it X
Thanks Lori. I am liking Carrara White. I am planning to fit it myself with a handy man I know – just looking for a company who supplies just that worktop please.
Regards,
Kartik
Home base sell it, but just type it in Google and it should tell you local suppliers. Someone with woodworking tools / kitchen fitting experience will be able to fit it no problem X
Hi Lori, thanks so much for your comments! I have so many people asking questions so it’s nice to hear from someone who has also had a good experience as we have! I’ve done a full review here also: https://www.swoonworthy.co.uk/2017/11/minerva-worktops-review.html/
xxx
Hi Kartik,
I just did a full review post here:
https://www.swoonworthy.co.uk/2017/11/minerva-worktops-review.html/
I wouldn’t necessarily recommend the supplier I bought from as we had some problems but agree with Lori, Homebase sell them and there are a lot of regional suppliers, just Google and call around! x