Oh wow, you guys. THE BIG REVEAL IS NEXT WEEK. I’m of course in a whirlwind panic trying to put the finishing touches on everything, creating a million and one lists for myself and making myself slightly batty.
Anyway, if you are new here or if you aren’t familiar with the One Room Challenge™, Linda from Calling it Home chooses 20 different bloggers to all makeover one space in 6 short weeks! Every Wednesday, we all share the progress on our rooms so be sure to check all of them out at the end of my post!
Catching up? Start here: Week 1 / Week 2 / Week 3 / Week 4
As you know, we’ve decided to give our very sad and neglected second bedroom a complete and total overhaul from top to bottom and turn it into my home office. We’d successfully torn down the ceiling, removed lining paper, replastered and filled the old walls, replaced all the old floorboards with tongue and groove pine flooring, stained and sealed the floor, painted the room, wallpapered, DIY’d a desk makeover and finally, we’ve been able to get the main furniture in place and the artwork hung.
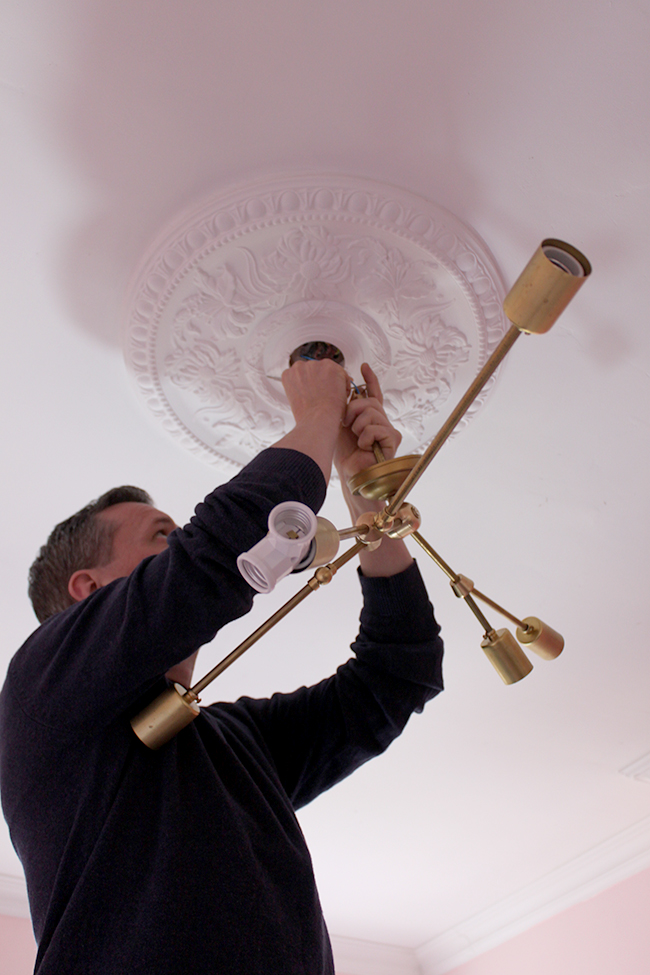
The next thing to tackle was the lighting. I actually bought the Lindsey Adelman You Make It Chandelier a YEAR ago and it was sat in a box in pieces all that time until we were ready to put it up so you can imagine my excitement when it was finally time! I purchased the kit from Grand Brass and at the time, there was only the US kit available so I ended up buying that, knowing that we could just rewire it for UK voltage. They actually now sell a UK kit (without lightbulbs) so if you were interested in purchasing one and you live in the UK, you can do so here.
Essentially, the only things we really needed to replace were the wires going through the fixture and the light bulbs to make it UK compliant – everything else is pretty standard stuff. Even the E26 sockets are actually so similar to E27 ones that are common here that you can use them interchangeably.

Putting it together was a team effort with both Wayne and I constructing parts and then Wayne joining everything together while I assisted (basically holding everything in place while he attached it all). You could probably do it with one person but I would recommend having two people – it just makes it a lot easier.

I marked each part with a piece of masking tape and the corresponding letter so that when it was time to fit the puzzle pieces together, it was actually rather effortless!

I chose a ceiling rose from Jim Lawrence in Antique Brass which matched perfectly with the fixture.

Fitting it to the ceiling was relatively easy – we just had to swap out to extra long screws to hold it in place.

Now, I wanted to get beautiful light bulbs that were similar in style to what came with the kit and so my first port of call was light bulb geniuses and one of my wonderful ORC sponsors, Dowsing & Reynolds (I’m not sure if you know Ally from Digital Diva but it’s her husband’s shop and she’s all kinds of lovely – you should go check out her blog.)
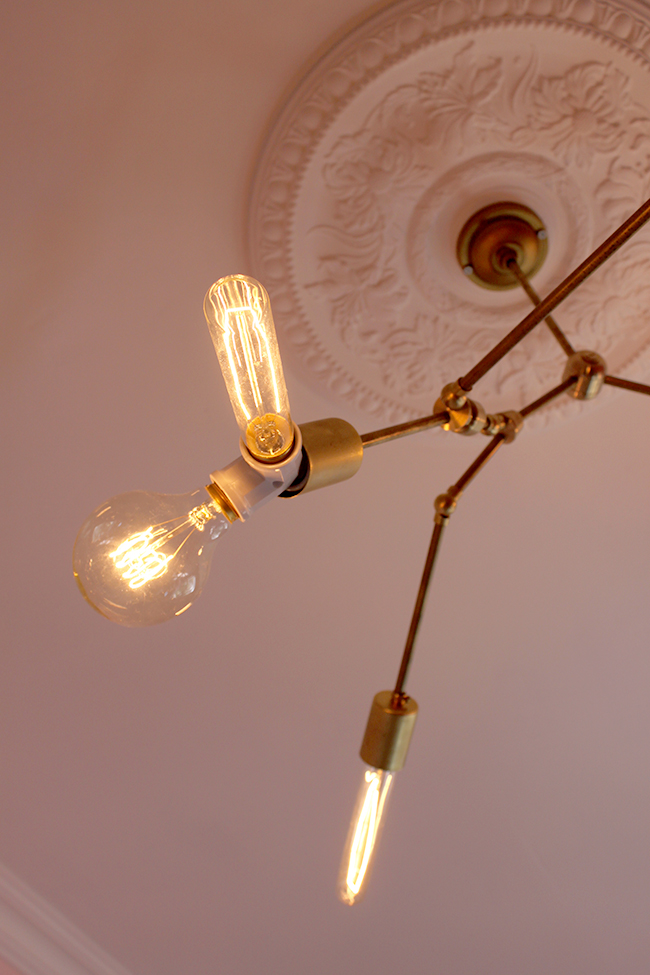
After a brief chat with Ally for recommendations, I decided on a combination of their fabulous vintage tube rods and the medium globe bulbs with the loop filament. And oh my goodness they are just SO PRETTY (even the packaging is rather lovely, don’t you think?).
 I want to fill my whole house with these things, let me tell you.

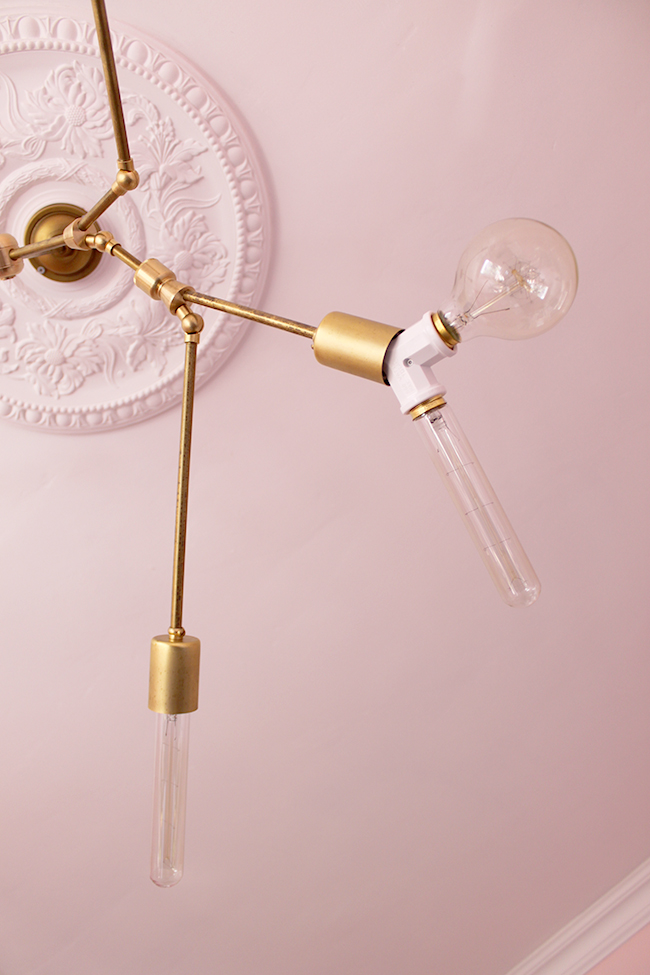
Here’s the whole thing…

And with the lights off… check out that juxtaposition of the light fixture against that ornate ceiling rose! Gah. I love it.

I also need to tell you about my amazing palm tree table lamps. Another fantastic sponsor of this project was Lighting Majestic (by the way, I am also one of their contributors on their blog) who sent me these two lamps as well as lampshades for my project. They have an amazing selection and carry so many different styles but these just stole my heart and were just so ME that I had to have them (this was obviously taken in my kitchen when I got them in – gotta save something for the reveal, right?):

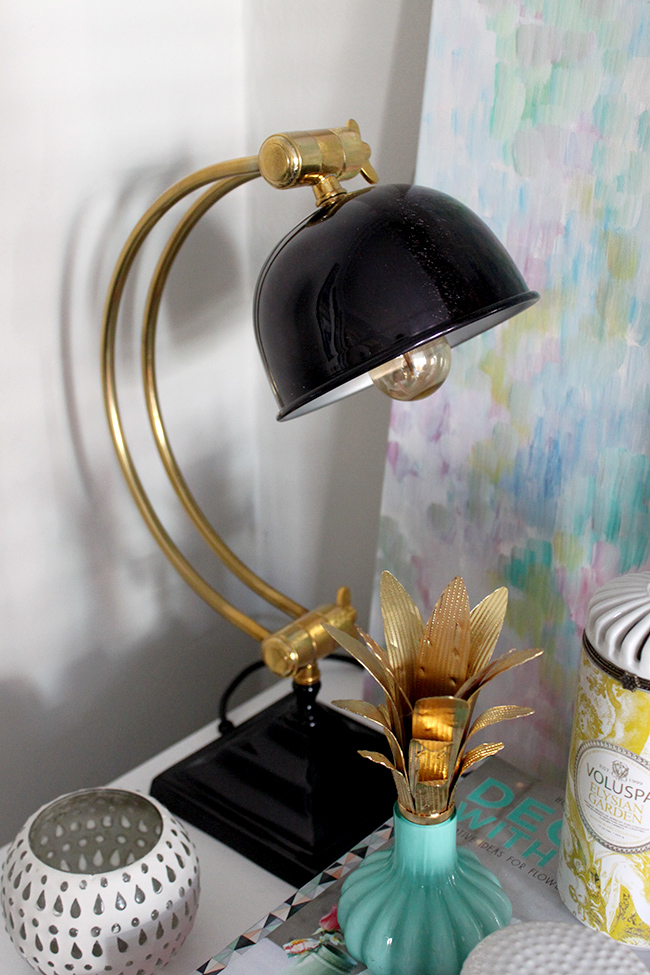
You may also remember my fantastic desk lamp from another sponsor of this project, the always wonderful Mia Fleur which will of course adorn my new fancy pants black desk.

Apparently, Abigail Ahern says you should have 8 pieces of lighting in a room minimum (WHAT?!) but it appears I’ve somehow absorbed that advice without realising it and have 5 different light sources in this room. Okay, so I’m 3 short (unless you count candles) but still, I think this is the first time I’ve really taken into consideration all the different lighting needs within one room ever! I still have the wall light to share with you but you’ll see it all next week!
Be sure to come back next week (or subscribe for updates!) FOR THE FINAL REVEAL! EEK! Are you as excited as I am?!
And now, do you want to see what all the other 19 participants are up to? Of course you do! Check them all out below.


That ceiling fixture is amazing, but your palm tree lamps stole my heart. I adore them. Can’t wait for the reveal.
Ahh thank you! I love those lamps too – so pretty! xxx
heart palpitations over this light!!!! huzzah!
Hahaha! Thank you Cassie! xxx
It’s all looking fab, and I’m pretty sure Abigail Ahern says candles do count as light sources!
Ahh than if Abigail says I’m all right, I must be doing it right then! LOL! xxx
Hey what Abigail says, you do!! Shes amaaaazing. And so is that light. Love love love it. I love medallion/chandy combos. Cant wait for the big reveal. I just know its gonna be stunning.
Aww thanks darling and YES Abigail is probably my favourite British designer, she’s just ace! Love her! xxx
Thrilled to see the final product. That light fixture is amazing…impressed!
Thanks so much Holly! xxx
Oh my!! Love love love!! I did think it would look pretty damn amazing, but it’s surpassed even my high expectations. The combo of the fixture, the bulbs and the ceiling rose is just lovely.
Can’t wait for the big reveal next week, you’ve done an amazing job :-)
Ally x
Yay! Thank you darling for those fabulous lightbulbs to make all my lighting dreams come true! xxx
Love this! Great DIY plus yeah… 5 light sources sounds right :) I’m transforming a tiny foyer and so far I have 2. Good luck! Can’t wait to see the final reveal! :)
Ahh thank you!! And good luck with the foyer! xx
I cannot cannot cannot wait for the reveal! I actually build a similar light fixture for my living room, and paired it with a fancy ceiling medallion — love the juxtaposition of the modern fixture and ornate ceiling medallion.
Ahh we’re definitely on the same page then! There’s just something about that eclectic pairing that gives me ALL THE FEELS! :D xxx
I love that lighting fixture…cant wait to so the reveal.
Thanks so much Taylor! Can’t wait to share it! xxx
OMG, I cannot wait to see Kimberly! That light fixture is incredible, especially paired with the ornate ceiling rose! And I love those palm tree lamps! Eek! So exciting!
Yay! Thank you so much darling!! xxx
Ooh exciting stuff! Nearly there! Love the combo of that beautiful ceiling rose with the brass light fixture… can’t wait to see the full room xx
Thanks so much darling! Can’t wait to share it! xxx
I absolutely can’t wait for the reveal next week, it’s going to be amazeballs! By the way, what is that turquoise bottle with the golden palm top, I NEED it in my life. My two fave things, turquoise and palm trees….where’s it from? x
Ha!! It’s actually a little vase (the blue bit) and the pineapple top was from a glass jar that sadly got broken – so I just stuck the top in the vase ;) So it’s a crazy one-off unfortunately! Nothing goes to waste around here, even broken stuff lol xxx
Well, it’s lovely, especially because it’s all been put together! x
WOW Kimberley! I’ve got total light fixture envy right now!! And the fact that you’ve painted your ceiling pink…Loooooove!! This is totally going to be “SWOON WORTHY” <3
Aww thanks so much hun! I didn’t actually paint the ceiling (it’s white!) but the reflection from the walls totally makes it look pink lol xxx
Oh wow! I love the fixture and am equally impressed with the wiring skills. All of the other fixtures are also fantastic. Yes, I am super excited to see the final rooms.
Thanks so much Linda! Can’t wait to see everyone’s rooms, it’s going to be a great Wednesday ;) xxx
You and Wayne do make a great team. It’s going to look something special. I’l save the well done’s for next week xxx
Aww thanks Pauline! I often say that Wayne is Swoon Worthy’s unsung hero! ;) We do make a good team! xxx
Love the light fixture! I bought one similar on Etsy but have not gotten it up yet! Love the vintage medallion with the modern fixture! I am most excited about seeing the final reveal!!!
Oooh get that baby up pronto! ;) Although I have no room to talk when it sat in a box for a year! lol Thanks so much, very excited myself! xxx
OMG!!!! Literally on the edge of my seat for the reveal next week! I have a feeling this is going to be my favorite!!! SO excited! That light fixture is unreal. xo
Hahaha! Thank you so much Claire!! I hope it lives up to your expectations :D xxx
Lighting to drool over fo shizzle
LOL! Thanks my dear!! xxx
I’m geeking out about this room – actually can’t wait to see the final result. I know that it’s going to look amazing – and I LOVE the light fixture. Go team!
Yay! Thanks so much Nadia! Can’t wait to share it! xxx
The lamp looks like a zodiac sign, really cool:) The only thing which would bother me is the white feature joining two bulbs together.
So funny because Wayne said the same thing! I figured I’d leave it for now to see if it bothers me (it doesn’t to be honest) but I thought I can always spray it gold perhaps in the future? I was surprised it comes that way myself ;) xxx
I love your light fixture & that palm lamp is amazing! Cannot wait for your reveal!
I am so freaking excited to see your reveal K!!!! I had no idea that light kit existed and I think it may be the answer to my dining room lighting dilemma!!!! This is going to be my favorite reveal, I just know it! xo
That light fixture though … I can’t even. It’s so beautiful and I ADORE the contrast of it against the ornate ceiling rose!!! UGH it gets me right in the feels. It’s so beautiful, and what can I say about those bulbs? Represent xx
p.s. Can’t wait to see the other gold geometric wall light. Aha! I haven’t forgotten about that little gem! Unless you’ve changed your mind about whether or not you’ll hang it in here. If not, you know my address. I will look after it well.