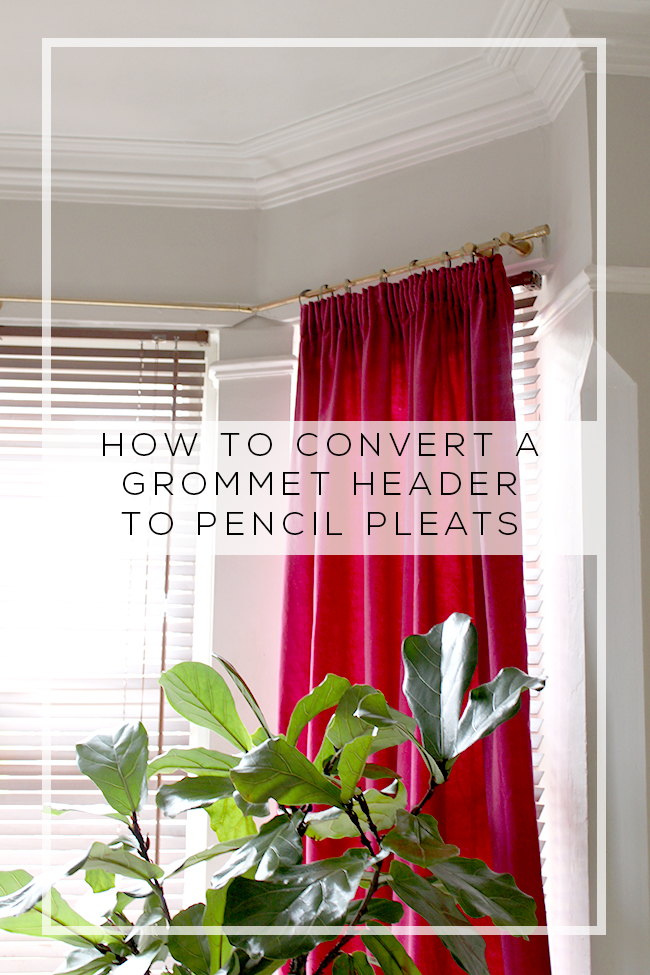
So as I said in my recent post sharing my Spring Refresh, I decided to change up a few things in the living room recently – by removing all the turquoise in the room, adding some plants and changing up my vignettes. That was a good start but the turquoise curtains and the stainless steel curtain rod were still sort of throwing things off and so I decided that I wanted to replace and update them.

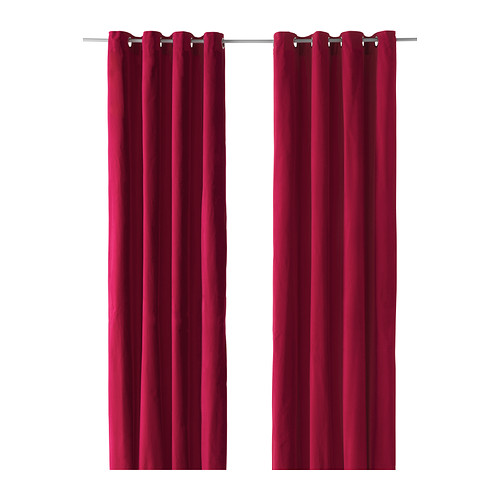
Of course, while I would love to have a huge budget to allow me gorgeous custom curtains on, oh I don’t know, a brass and lucite rod, well, that wasn’t going to happen because I don’t have that sort of cashola. So off to Ikea I trotted and when I spotted the SANELA curtains in the same velvety lush fabric I had previously, I knew they’d be perfect.

What wasn’t perfect about them, however, was the grommets (or eyelets as they are also referred to). Now I had grommets on my previous curtains but I wanted something a little different and I knew they’d clash with my plans for the curtain rod. The good thing is that these curtains come LONG – 3 metres long which, thankfully, was longer than what I needed. We’ll get back to these in a second.
First things first, I took down the rail and spray painted it in my trusty Montana Gold Gold Chrome with two coats, gave it a couple of days to dry and then obviously, put it back up. Already a vast improvement.

And then I tackled the curtains. Now I am a BAD BLOGGER because I didn’t take pictures of the process of converting them from grommets to a gathered header. I know, I know. But to be fair, I honestly didn’t have a clue what I was doing to start and changed my mind about 5 times through the process and I didn’t even think it would work. But hmmm… it turns out it did.
So I’m going to try to explain because to be honest, it was really easy. So easy.
I could have done a simple rod pocket here but I wanted something a little more sophisticated so I decided on a loose and casual pleated hem.
How to convert Ikea grommets to a soft pleated curtain header:
I first measured from the rod to the floor to see what the finished size needed to be. I added another 10cm to that measurement.
Using that measurement as the total height required for the fabric, I cut the excess from the top of the curtains where the grommets were (leaving the bottom hem in tact). Then I folded the top over 2cm, ironed it and folded it again another 8cm so the cut part was hidden underneath and the final size was the finished measurement. Then, using super-simple-to-use web tape, I ironed the fold closed. This created a nice sort of placket at the top of my curtain.
I then sewed 3 inch curtain tape to the placket I’d just created, pulled the strings so that the gathers were created, tied the strings at each side, added my hooks and attached them to the curtain rings.
That’s it. Told you it was easy!

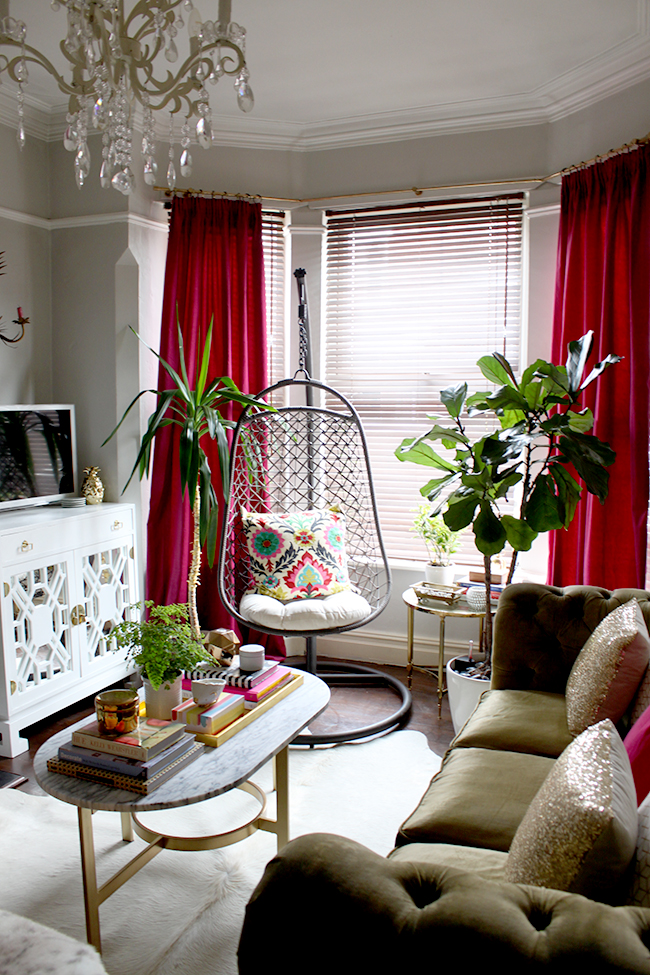
I’m so happy with the new curtains and the colour it brings into the space. We don’t really use them across the whole bay, they are really just to add some softness to the window but I probably would have needed a few more curtain panels if that’s what I wanted to do (simply sewing them together for more width). But the colour combination of the olive green of the sofa and the deep berry pink of the curtains really highlights the touches of cerise pink in here and it all just makes me incredibly happy.

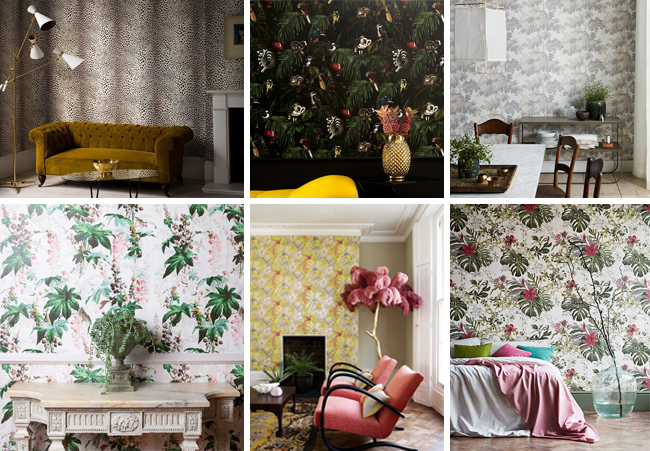
But there’s more news… On Friday, I showed you a bunch of wallpaper that I’m loving lately and I told you one of them was going in my house somewhere… well, that somewhere is in here!! Yep, I’m replacing the Cole & Son’s Cow Parsley which has served me well for nearly 5 years – but ya know, it’s time for a change and a chance to create a slightly different look in here.

So, I’m still not going to say which one it will be (even though I got my sample in and fell in love with it) because I’m mean like that and I enjoy torturing you ;) – and also, I like the element of surprise! However, I do intend to get this done in the next couple of weeks so I’ll be showing you that very soon, I promise!
Here are the choices again (maybe it’ll be easier to guess? Hmmm…)

I also have an announcement on Wednesday that’s kind of a big deal so be sure to stop back then!! I have been having to keep quiet about it for SO LONG but I can finally give you a little hint about what’s going on around here…
In the meantime, what do you think of the new curtains? Is this a DIY you would try?


Ohhhh you absolutely NAILED IT, Kimberly! They look so swish, and I genuinely was scratching my head as to how you sewed up the eyelets. I was all like “oh god, she sewed up all those holes? That poor woman needs a drink”, but no. You’re much cleverer than that. Much.
They look all kinds of yes xx
LOL! No sewing of any holes required! But I still needed a drink afterwards… xxx
HI Kimberly
If you put the final ring on both outside ends of the curtains OUTSIDE the bracket, then you’ll get the curtain to cover the window frame more. Its called stack back and it’ll look more polished – it won’t fall off if you guide it with your hand when you open the curtains.
Diane ;-)
Ya know, I tried that to start but I kept knocking the damn thing off the rod!! LOL! I agree though, it would probably look better – perhaps I’ll change it back ;) xxx
Exactly my thoughts, anyway the curtains are lovely:)
Those are lucious! I just love the color and the drama :)
Thanks darling! I am a little in love with that deep berry colour myself – it was one of those times you just think, ‘why didn’t I do this a long time ago?!’ xxx
A brilliant job of those curtains!! Am due to do similar job myself as I loved the Sanela curtains but also didnt want those funny grommets all over the place – I think I can be brave enough to do this as it really looks good!
On guessing the wallpaper I’m favouring the leopard – subtle but very Kimberley!!
Yay! Let me know if you go for it, it was mega easy once I wrapped my brain around it ;) As for the wallpaper, you’ll have to wait and see! Eeek! xxx
I love the look of pleated curtains, but I don’t like the hooky-things that I’ve always had with them – the curtains never open all the way and they just annoy me.
So I might have to try hanging my current curtains from rings instead and see how I like it. I love the Sanela curtains too :-)
Also, I’m thinking #6, although #2 could be amazing too. I can’t wait to see it all “finished” :-)
Ahh this is what I was struggling with as well! How to attach the pleated curtains the best way – I do like the rings though – give it a go! Thanks so much, can’t wait til it’s ‘finished’ too! :) xxx
I love it! The bold raspberry brings so much new energy to the room! I can’t wait to see what wallpaper you’ve chosen!
Thanks so much Brynne! I’m really happy with the colour, it’s not one I’d previously even considered but as soon as I spotted them, I knew! :D xxx
Love the color of the curtains Kimberly! It just makes the room pop! Looking forward to seeing which wallpaper you chose.
Thanks so much Amanda! xxx
I’m cheering over here. Sanelas are my favorite, such great quality. Oh why haven’t I noticed this color before. It looks fabulous in your room
Thanks hunny! I know, it’s one of those colours that I’d not even thought of before but as soon as I spotted them, I just knew it’d work :D xxx
Hi Kimberly, love what you did with the curtains they look fab and your room is beautiful. We have similar sofas, I have beige velvet chesterfields from decur.co.uk I love the colour of yours they go so well with your curtains, you nailed it! Love the blog :) x
Ahh thank you Jennifer! I do love a Chesterfield, they are just so classically beautiful, aren’t they? Good choice ;) Thanks so much xxx
Oh gracious me woman!!!! Those curtains are sooo lovely. I don’t know how to sew so Ill just oogle over yours in envy. I would loooooove to get some blush ones for my living room. Also im dying over the wallpaper options. My first instinct is telling me youre going for the bottom left. Don’t know why..I could be wrong. Love your face.
LOL! I promise it’s not that difficult, I literally just sewed 4 straight lines ;) You could totally master that! Oooh blush, now you are talking… Ikea, are you listening?! GET ON THAT NOW. And you’ll just have to wait and see which wallpaper I choose (I know, I know, I’m evil) ;) MWAH RIGHT ON YER FACE xxx
Oh and also I looooove that hide rug:)
I do love me a white hide!! They are indestructible as well – bonus! xxx
amazing! i love the color and the drama they add!
love how these turned out and they look so good for being from ikea! we will be moving soon and i envision lots of curtain projects in my future!
They look so good! Such a warm vibrant colour, and they really do look amazing with your olive green sofa! Love the pole in gold too, it really works with the room.
As for the wallpaper, I couldn’t possibly guess! Oh, and I love that Matthew Williamson one.
Looking forward to tomorrow’s announcement – you are such a tease!
Maria xx
Love the colour. I have adapted ready made curtains myself before and, like you say, once you get your head around it they aren’t too difficult to change. I’m leaning towards the leopard print!
They look really fantastic! I just bought the same curtains and was contemplating how I am going to get rid of the rings as well.
Hi, Kimberly.
I just recently stumbled on your wonderful DIY article, and am planning to do the same. I just have one question on how you sewed the 3-inch curtain tape. Did you machine sew it in? and if so, were the machine stitch lines visible on the front of the drapes? Thanks!
Hi Tricia, I believe I machined sewed it and just used a thread the same colour as the curtains – hope that helps! x