I must say, I’m 3 weeks into my mini-makeover and the dressing room is starting to look sweeeet.
One very big thing that we completed now is that the Billy bookcases are finally done (whoop!) and ohmygawd I love them. I’m not going to share them today all styled up (that’ll have to wait a bit because I kind of want show the whole room done up at this point) but that will be hopefully in the not too distant future.
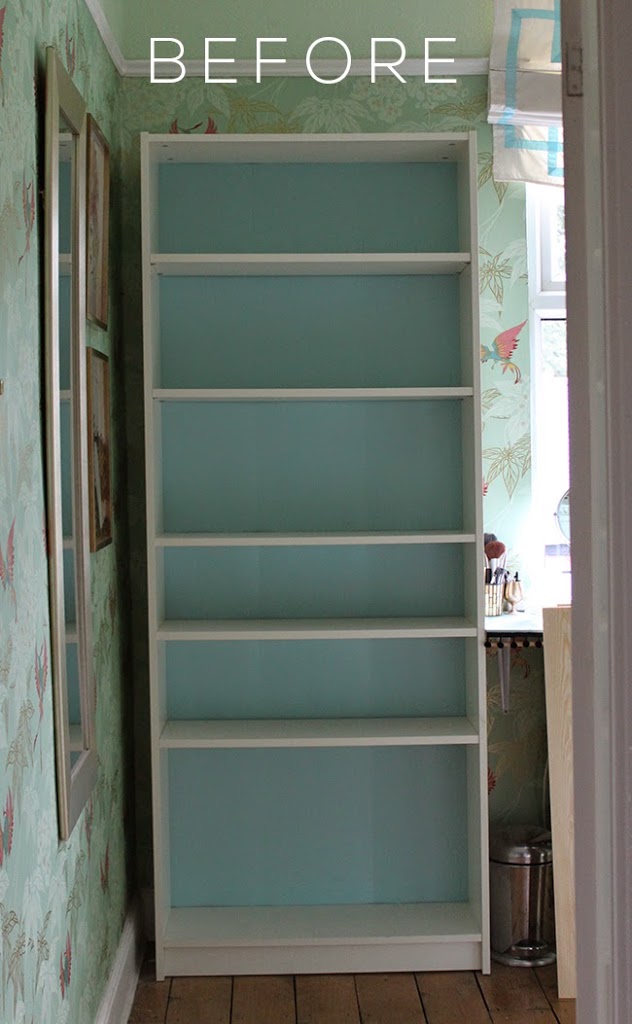
Here’s where we started with them…I had originally painted the backs when I first put them up but it was time for a proper makeover.
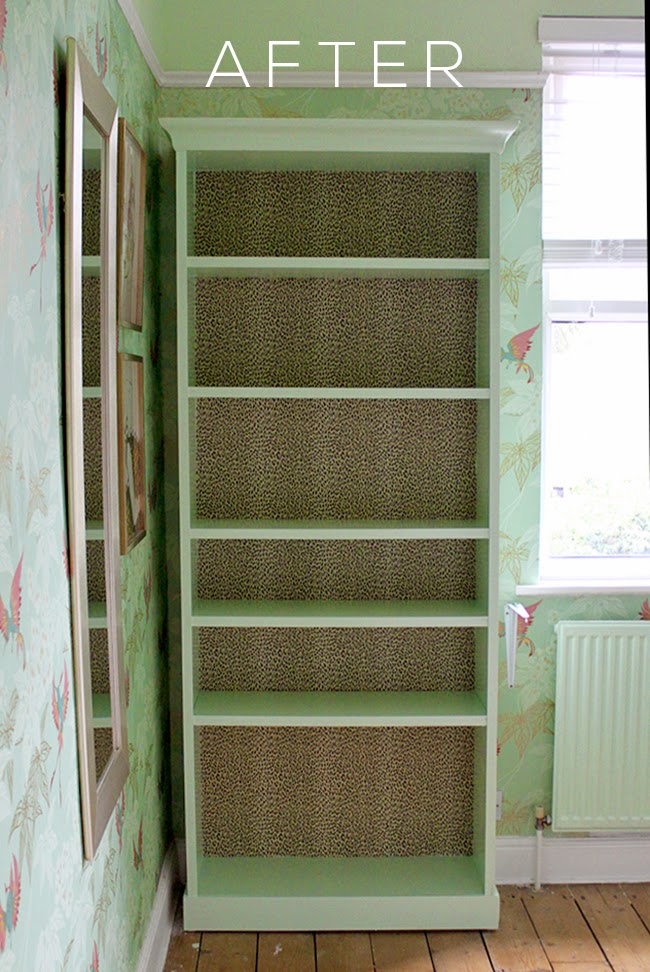
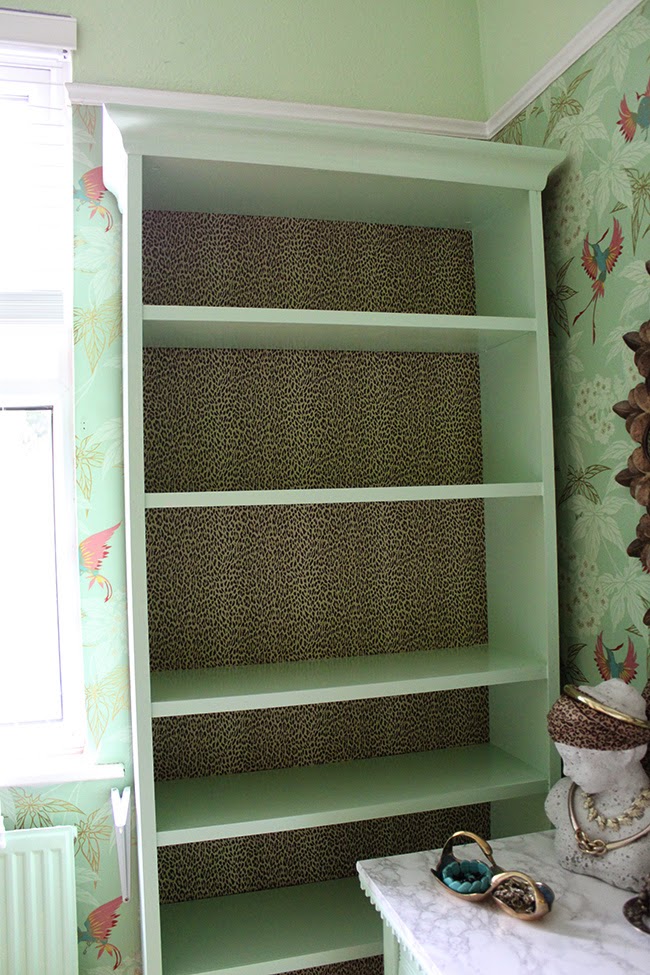
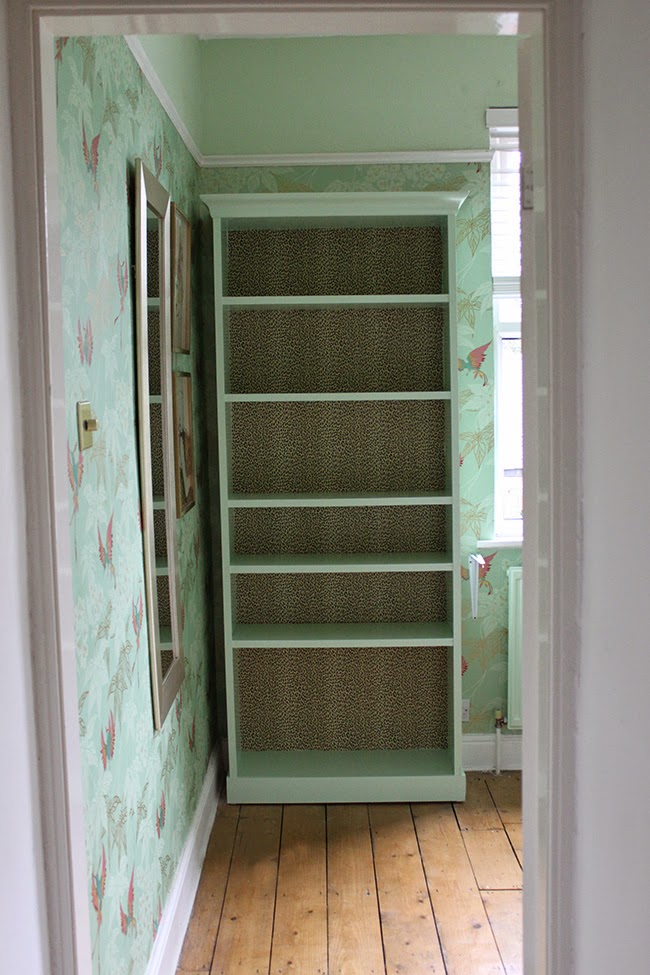
And makeover they got. Here is what they look like now…
Oh yeah baby, can I get a hell yeah? HELL YEAH.
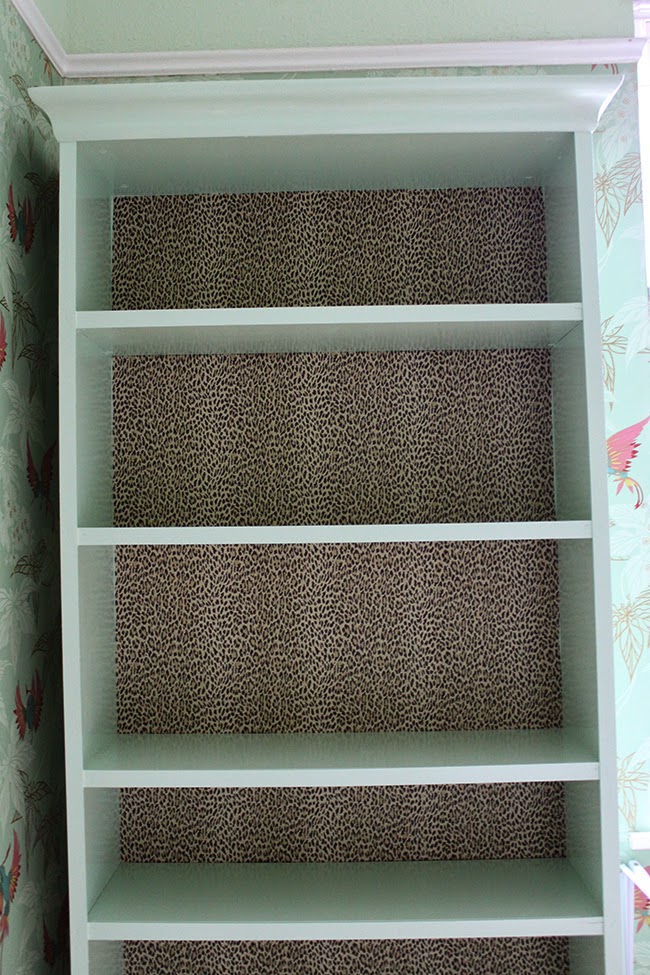
I just had to go with the House of Hackney Wild Card wallpaper. I’d received samples of 5 different leopard print wallpapers at various price points and it was a bigger spend than I’d originally intended but there was just no question. It’s simply a STUNNING wallpaper. How a pattern can be both delicate and bold in the same breath I honestly don’t know but what I do know is that I’m thrilled with the outcome.
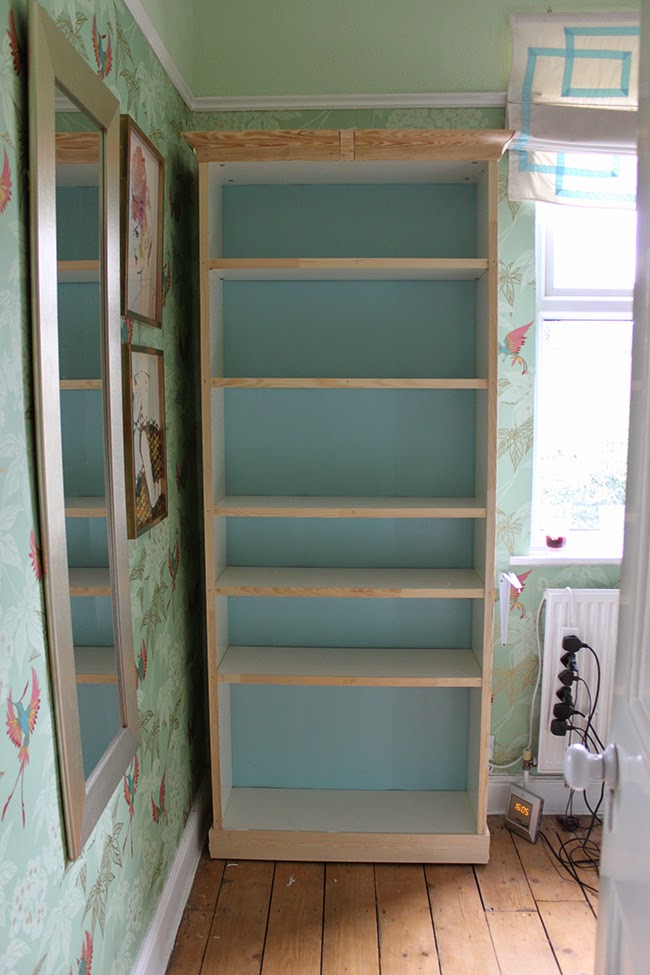
You can see we added cornicing to the top and trim on the sides, bottom and across each of the shelves as well.
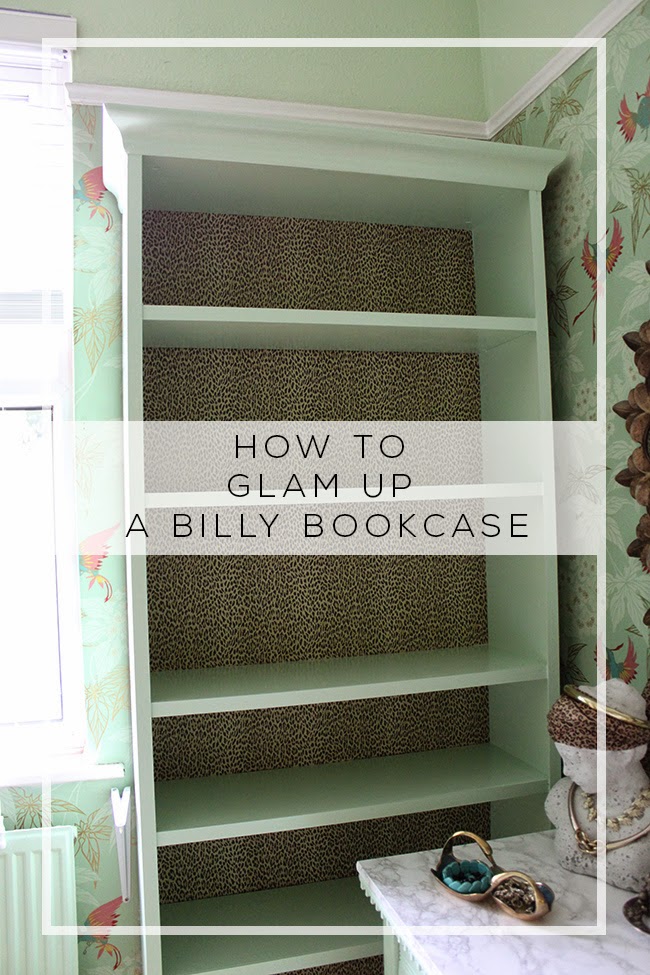
I’m going to talk through how we did it in case you were interested in doing this yourself. If you aren’t interested, you can skip to the bottom to see more pictures ;) Or you can just pin that picture below for future reference! ;)
Oh and a little disclaimer… I don’t want it to sound like this was my unique idea – it most certainly wasn’t! There are so many great tutorials for this online (just search ‘Billy Bookcase Hack’ on Google and you’ll see lots of different ways people have used these) but this is just the way I did mine! Right! On to the tutorial!
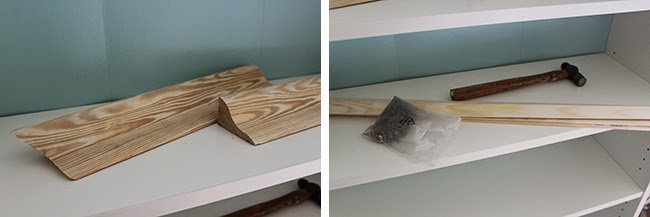
I purchased all of the trim at B&Q. We couldn’t seem to find wood coving/cornicing/crown moulding (or whatever you wish to call it) – it only seemed to come in the heavy duty plaster or the lightweight polystyrene type, neither of which was really suitable for this kind of DIY. So instead, I purchased door rain guards! (I realised afterwards, however, that Wickes carries a pretty good selection!) Yes, these are actually meant to go on the bottom of doors but we simply flipped them upside down and they worked perfectly. We also purchased some flat trim that was about 2 cm wider than the unit all the way around (to make them look a little ‘beefier’) and wider planks for the bottom of the units.
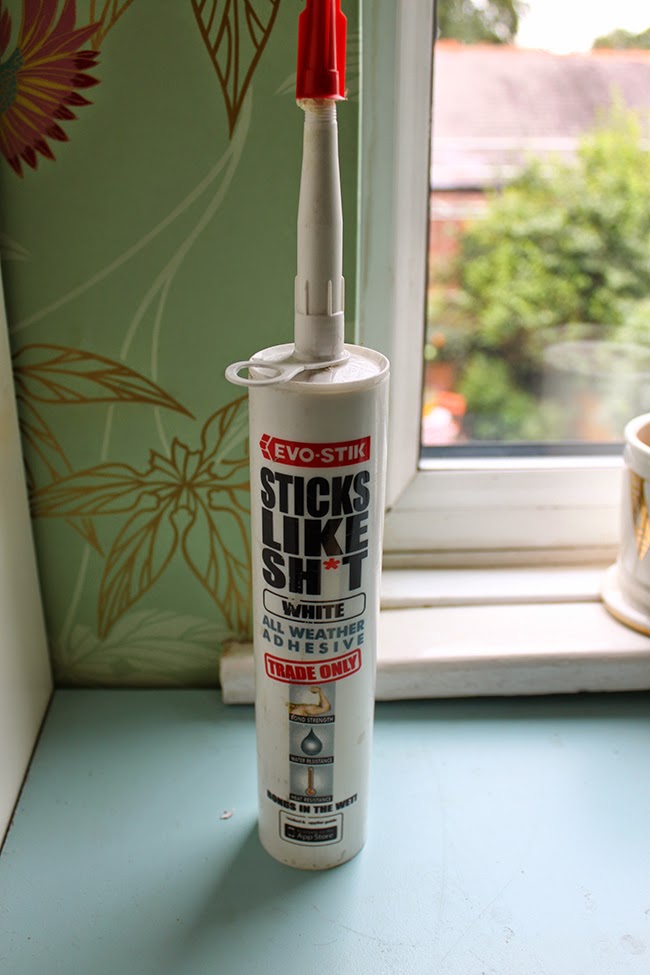
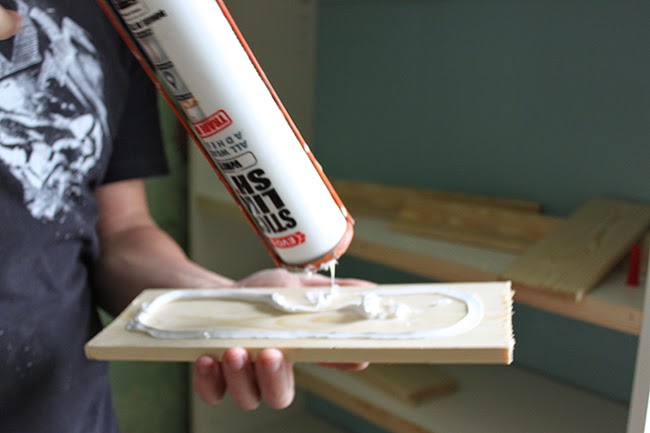
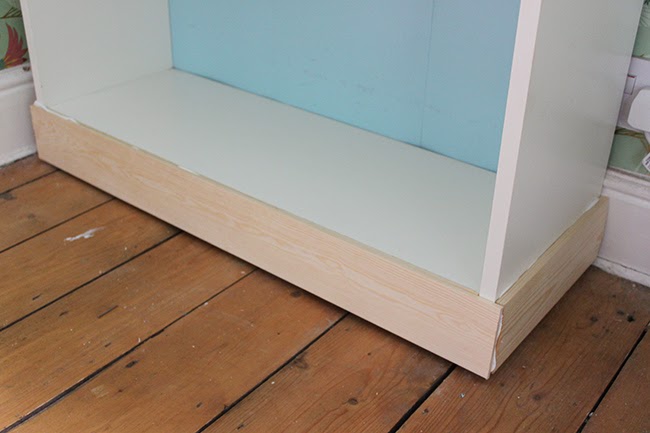
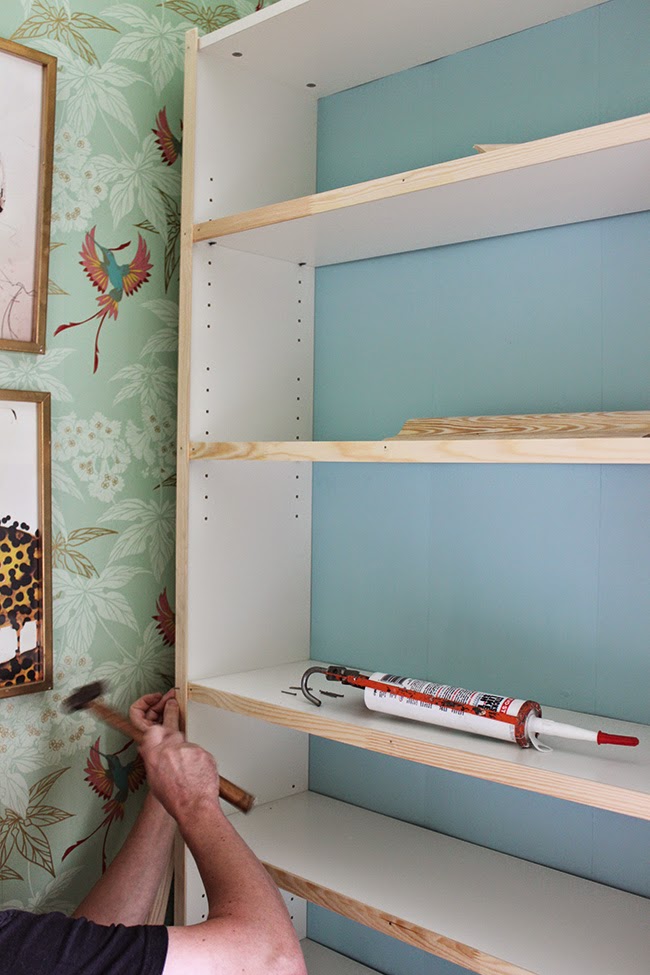
We started with the trim along the bottom first using this stuff. It does exactly what it says on the tin – HA!
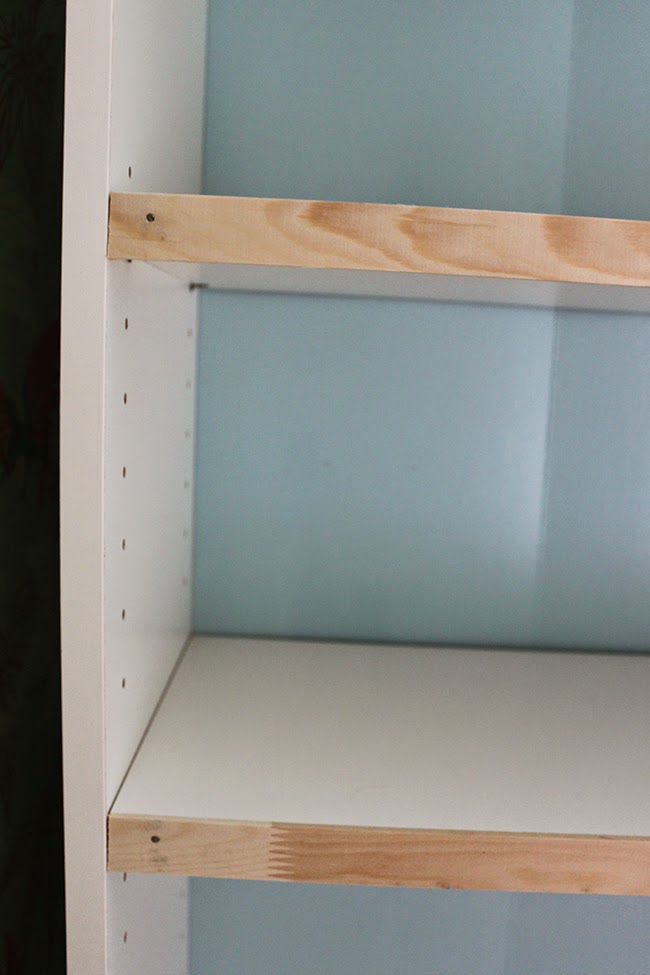
(You can see where the stuff sort of ‘squidged out’ the sides – once dry, it was really easy to just cut off and remove with a razor blade.) We then added the flat trim along the front of the shelves, flush with the top of each shelf.
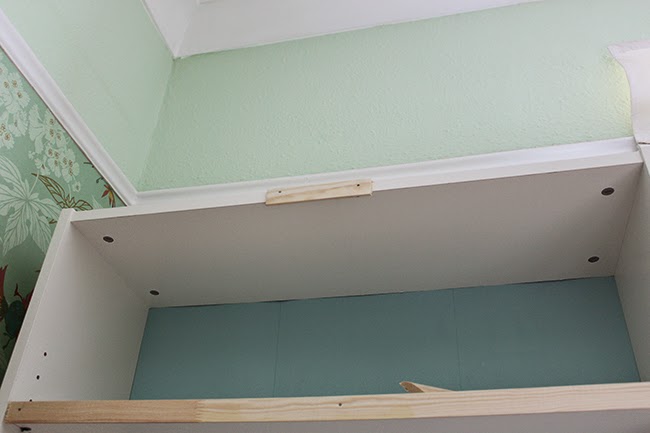
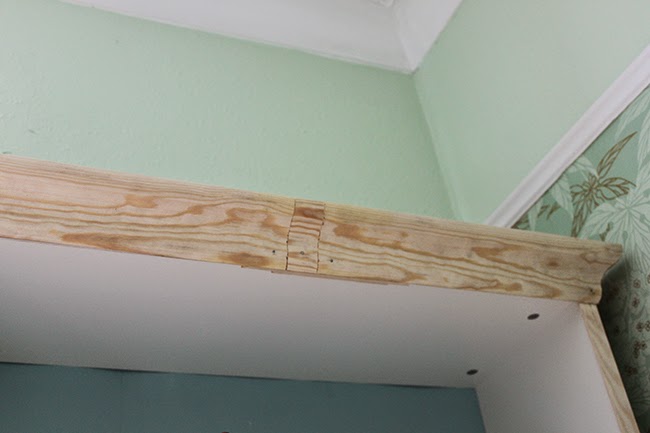
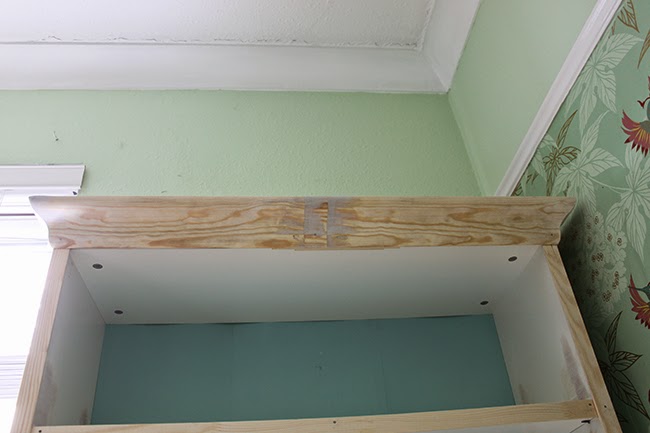
You’ll see when you do this, the shelf depth ends up being flush with the sides of the unit. At the top, we added a small piece of trim for the cornice to sit against so that it would sit flush against the outside frame. This is because the shelves and top of the unit are slightly narrower than the vertical sides so you want to make sure it’s all at the same depth all the way around. A little difficult to explain but hopefully you can see what I mean from the pic below.
Once the horizontal trim was in place, we added the side pieces. We just used panel pins to keep everything in place.
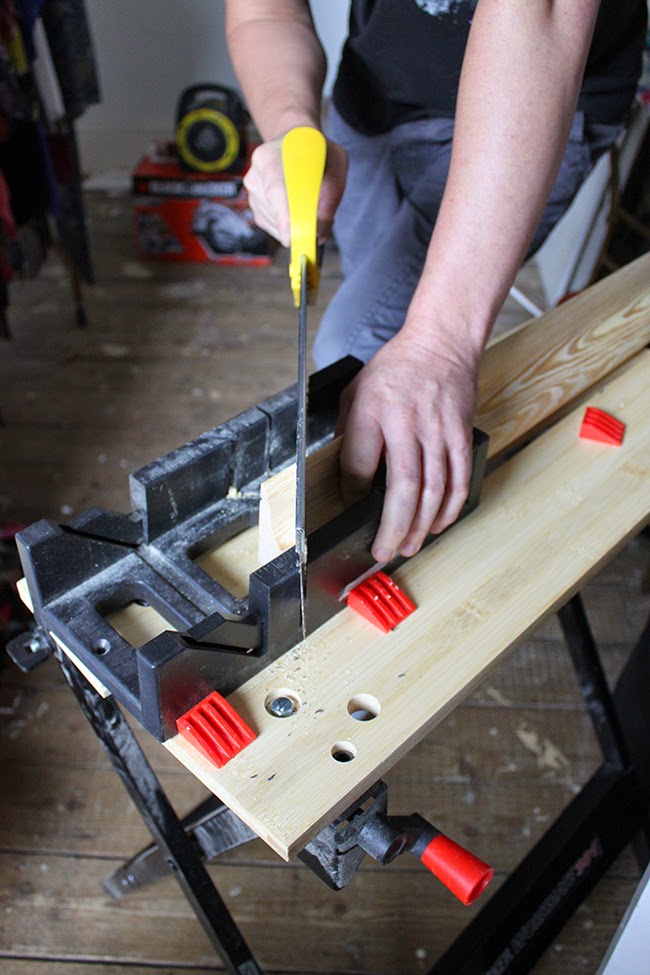
Then the cornice went up after a lot of swearing about angles and a rubbish hand saw and a lack of a proper mitre saw. I think that’s getting added to my ‘tools I must remember come Christmas’ for my shopping list for Wayne, bless him.
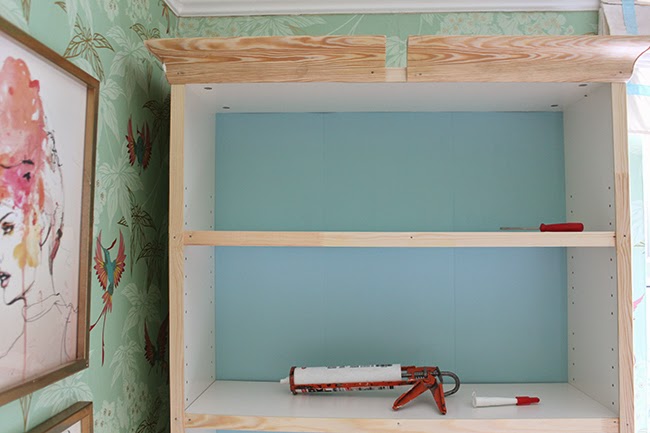
The boy done good though because the sizes I purchased weren’t quite long enough to wrap around the entire top (I’m bad at math and forgot the length needed was not just the length of the entire top all the way around but the length of the entire top at a mitre angle making it larger than I realised) so we ended up with gaps at the top which we filled in afterwards with some cut-offs. Whoops. It’s okay, it turned out fine in the end.
One everything was all trimmed out they looked like this.
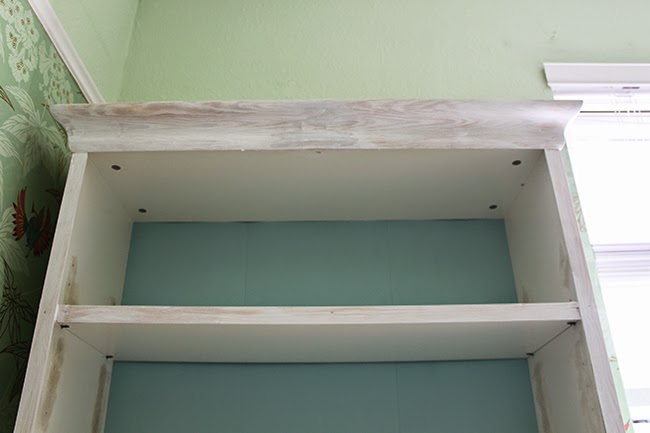
Then it was time for filling. All the little holes in the insides making the shelving adjustable were filled. The trim was filled where needed as well and then all the wood and filler were sanded.
And then it was time to prime the units. I don’t have a picture of it but we used a spray on primer for the laminate parts – it’s specifically for plastics and it worked a treat. The wood got a coat of oil-based primer as well.
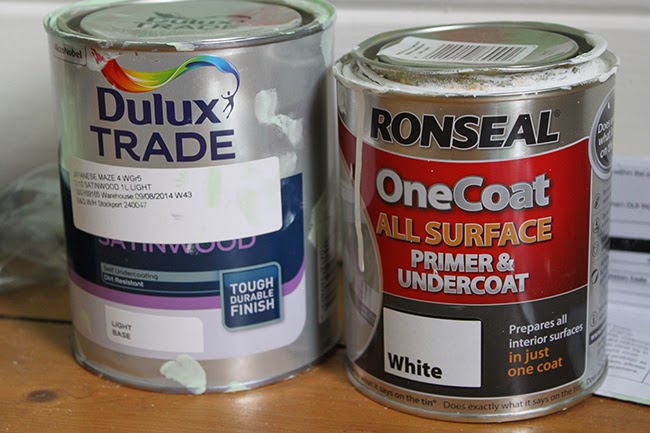
Here’s what I used (plastic primer not pictured):
One coat of primer and two coats of Dulux satinwood paint and they were looking so much better already. The Dulux satinwood paint goes on like a dream and it’s the same paint I used for the chest of drawers. Yes, 16 hours of drying time PER COAT. It takes a while. It is, however, worth the wait for the beautiful finish and its resistance to scratching.
I ended up painting both bookshelves over the course of one weekend (one coat Saturday, another coat Sunday) and then putting the wallpaper up the following weekend. So there was plenty of time for the paint to dry and fully harden.
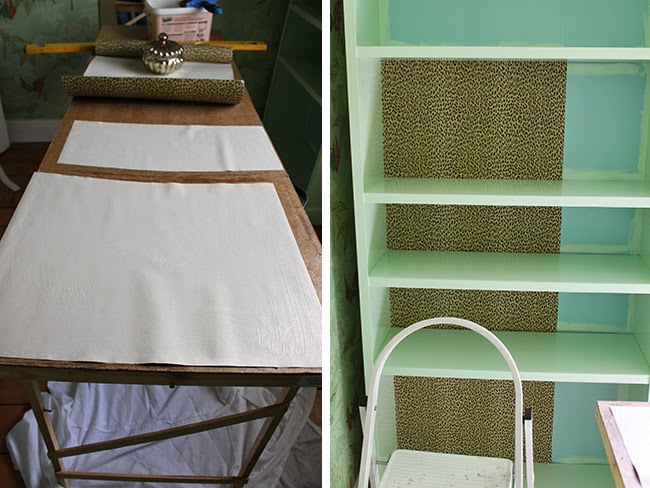
I tackled the wallpaper in the same way I did my kitchen shelves. I ended measuring each piece required and cutting them individually, starting from the bottom up. Trying to fit a long sheet of sticky wet wallpaper behind the little gap behind the shelves would have been impossible so this made things a little easier although it did still take me 5 hours to get the wallpaper completed! This is because each rectangle between the shelves are not perfect 90 degree angles and so while the larger initial pieces went up quickly, I found marrying up the side bits a little more work. I ended up having to make templates with newspaper for each piece to make up for the slightly wonky angles.
After all that work, I have to say, I really do love the units. (Cue making lots of excuses to simply go into my little dressing room and just stare and sigh like a love-struck teenager.)
Ahh… yes, young love! *sigh*
So after all that, here is where we are on the list of things to do for my dressing room mini-makeover:
- Sand and repaint the chest of drawers
- Add DIY faux marble top *
- Spraypaint new light fixture
- Replace pink chandelier
- Add trim and cornicing to Billy Bookcases
- Prime and paint bookcases
- Wallpaper backs of bookcases
- Replace roman blind
- DIY a box/pelmet valance*
- DIY larger vanity top
- Make a new vanity skirt
- Replace rug*
- Replace vanity mirror*
- Replace full length mirror*
Oh yes, we’ve been tearing at full speed through the list (so very unlike us, really, no? Are you surprised at our pace? Because I’m surprised at our pace.). It helps that the month of August was pretty much a wash-out weather wise. It turned colder and then rainier making the pull to spend time lazing around in the garden a non-option so we’ve just been getting on with multiple things nearly every weekend.
I can’t wait to show you some more progress but until then, what do you think of my bookcases? Is this something you would tackle yourself? To be honest, aside from the waiting time, it wasn’t a terribly difficult project at all, just very time-consuming! Do you think it was worth the effort?


I agree with Elizabeth it's so awesome!!!
I'll give you a big hell yeah because that is damn awesome. Excellent my friend!
Did you consider removing the back panel to wallpaper it then nailing it back on? That's what I did, takes about ten minutes and gives a much cleaner finish
I remembered when I put them together the first time, I'd painted the backs. The paint made the backing a bit warped and so trying to slide them into place was really difficult. The backing isn't just nailed into the back, it slots in. So I was a little afraid of risking that! I think if it were a brand new bookcase, however, that would definitely be the way to do it! :) xx
Beyond gorgeous and ingenious…love it!! X
It looks brilliant, I am mid way through updating a bookcase I bought from a charity shop. I have painted it and now just need to wallpaper the back when I get time. I won the wallpaper on one of your competitions so hopefully it will be totally swoon worthy when I have finished!
Oh yes, I remember Claire!! You'll have to send me pics when it's all done! :) Good luck! xxx
I love it!
They look so much better! And the best part (given that the wallpaper was rather pricey) is that they're not actually built in- so you can take them with you when you move :) xxx
I thought the same thing ;) Indeed! xxx
Hell yes, they look fabulous!!
girl, yer a genius!<br /><br />love to you.
Wow
Fab job, it instantly makes a difference to the room. Shelving units with bold backings are a great way to make a huge impact but in a controlled way. It contains the style, making it a statement piece without disturbing the rest of the rooms decor. Really lifts the space, I can see why you're over the moon :O)
Leopard love!!!!! I can't wait to see how you style dem shelves!
So very gorgeous! They don't look like Billys at all now, fabulous work on them!
Absolutely fantastic! Brilliant- thanks for the inspiration xo Nancy
Yes that leopard print !!! Your favourite. Good going.. its beautiful!
Beautiful dressing room designing ideas.. like this post very much.
This is amazing! I’d like to do something similar for when I move house in a few weeks time, but would need the bookcase to be up and running on my first day of moving in, so would need to do any customisation work in advance and would probably need to transport it still in its separate flat pack pieces (vs. assembled).
Do you think it would work if I painted all the parts separately and then assembled? Do you think the trim along the bottom and the cornice along the top could be painted in advance (along with everything else), and then glued on after assembly? I know the finish probably won’t be quite as good, but I’m mostly wondering whether the painted surfaces will stick to each other ok?
Hi Kate, I really wouldn’t want to recommend it, simply because I didn’t try to do it this way. My only thought – aside from the fact you’ll risk some damage to the paint in transport and whilst putting it together – is that the back panel is MDF. Originally I’d painted the back panel and then once dry, tried to assemble the bookcase. It was much more difficult after the fact as the paint made the thin layer of MDF warp slightly and I struggled to get it into place. So if you were to wallpaper it first, you might have a similar issue. xxx