Oh my dear sweet lovely peeps… I have a confession to make: this might actually be one of my favourite DIYs ever. It’s cheap, it’s quick and the end result looks a million bucks. Oh yes, I wish I was exaggerating but trust me, I really am not.
Now as you probably know from my previous post, I recently repainted my chest of drawers in the dressing room a lovely soft mint green.
When I was initially questioning what to do with it, one of my lovely readers Jetta commented suggesting either a mirror or faux marble top. While mirror would be a bit too much upkeep (I use a lot of product for this crazy mane of mine, I could just imagine how difficult it would be to keep clean), the idea of the faux marble stuck. I’d of course seen it done on blogs before, most recently in Shannon from Burlap and Lace’s office remodel and it looked utterly amazing. (In fact, her entire office remodel was stunning so go check that out after you finish this post! ;))
Of course, I’d only seen it on American blogs and despite endless searches, I couldn’t find any ‘Marble Contact Paper’ here in the UK. Hmm. What to do, what to do…
Well, lo and behold, like so many things wonderfully British, it turns out there is such a thing. Except here (and I’ve got to love the way the British are so literal in their nomenclature), it’s called ‘Sticky Back Plastic’. Eureka!
Oh my lovely friends, this is the best part… I purchased it from Amazon for SIX POUNDS. Oh yes, now that’s what I call pretty on the cheap!!
Here’s how we created my faux marble slab for under a tenner…
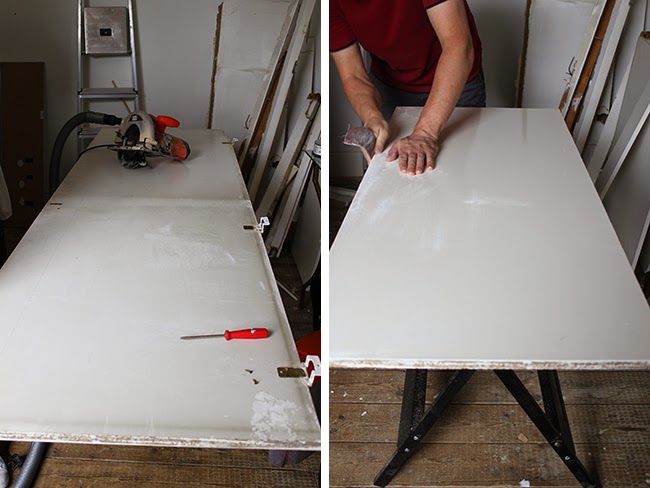
As part of the renovation of our guest bedroom, we tore down the old closet in the corner of the room. The doors were still in there, waiting to be discarded or used for something else and I realised I could easily get my top by cutting one of the doors down to the size needed for the top of the chest of drawers. (Cost: £0)
The first picture is the underside of the original door. We cut the door to size, removed the hardware and sanded down all the knobbly bits of paint etc so that we had a totally smooth surface to apply the sticky back plastic. You want to ensure the surface you plan on covering is clean of any dust or uneven surfaces so be sure to start with that.
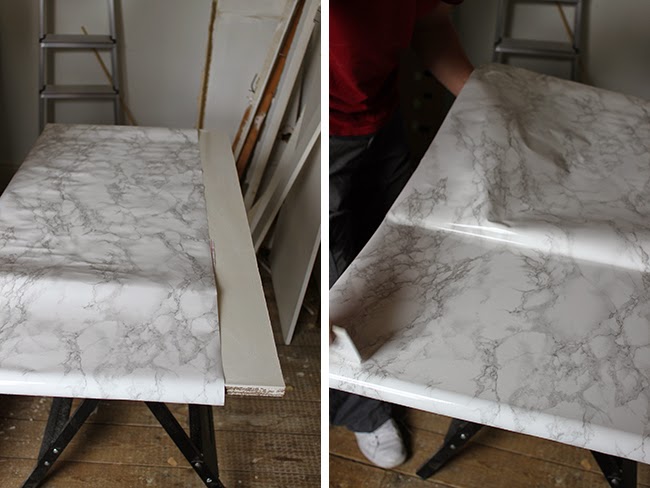
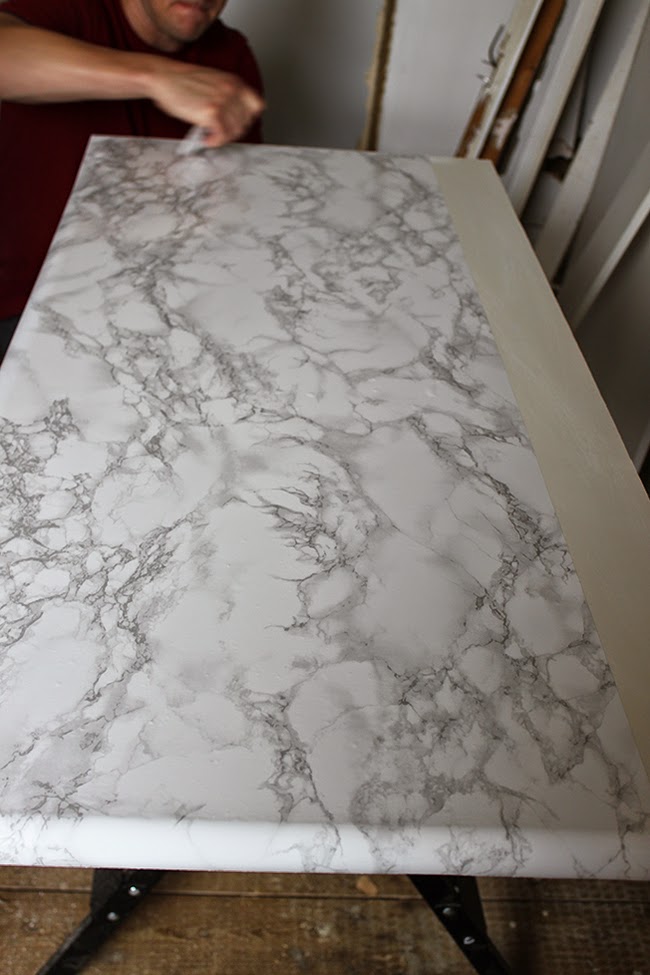
Next, lay your sheet of sticky back plastic so that it’s nice and straight with a bit of an overhang on all sides (you’ll be wrapping the paper around the edges to get that ‘slab’ effect so you want to make sure there’s enough overhang to do that) and begin to pull the backing paper off slowly from underneath the sheet. As you do this, use a plastic scraper to work out any air pockets that might appear, pushing them towards the unstuck edge.
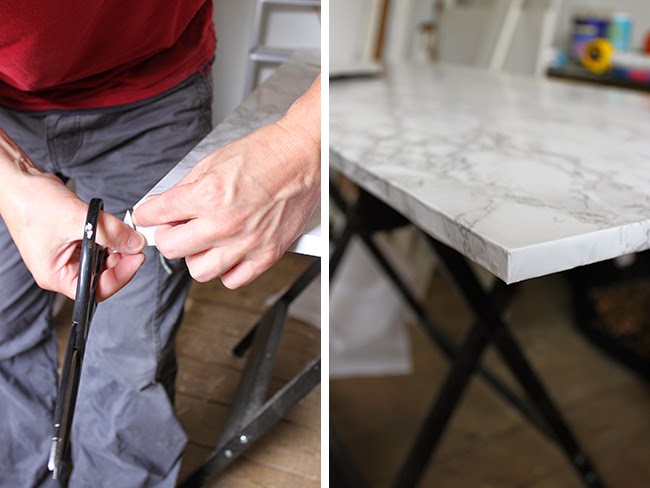
When you get to the end, wrap the paper around the edge and use the scraper to create a nice sharp edge.
Once wrapped around the edges, cut off any excess paper to create a sharp corner.
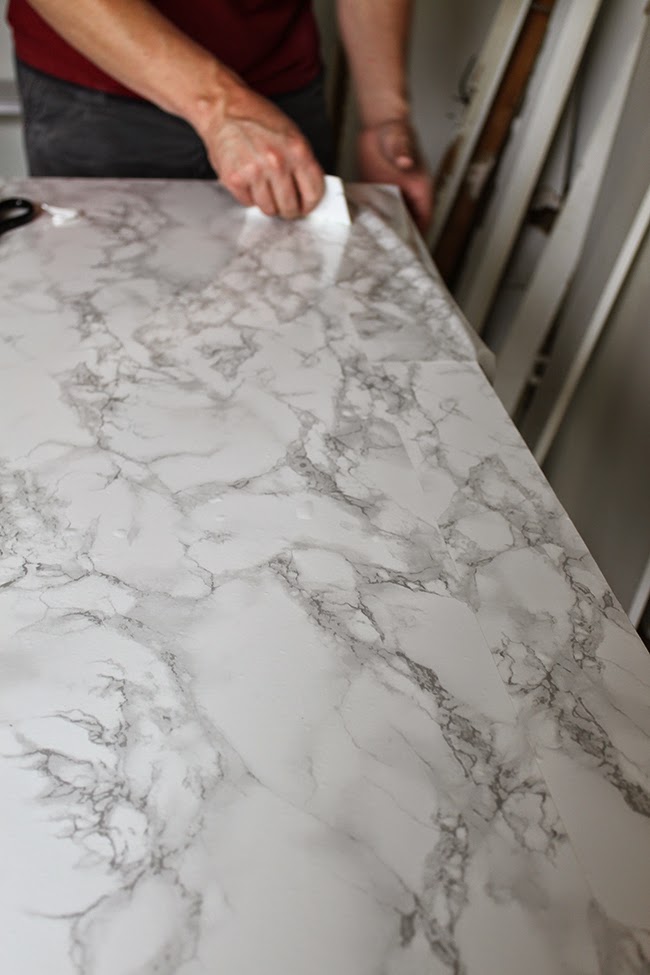
Now as you can see, the roll wasn’t wide enough to cover the entire piece of MDF so there is a seam where we had to join the paper. The pattern, however, is such that it’s surprisingly not too noticeable as we did our best to match up the pattern and you can’t even tell except when you really look for it. Very impressive.
The whole project took less than an hour!
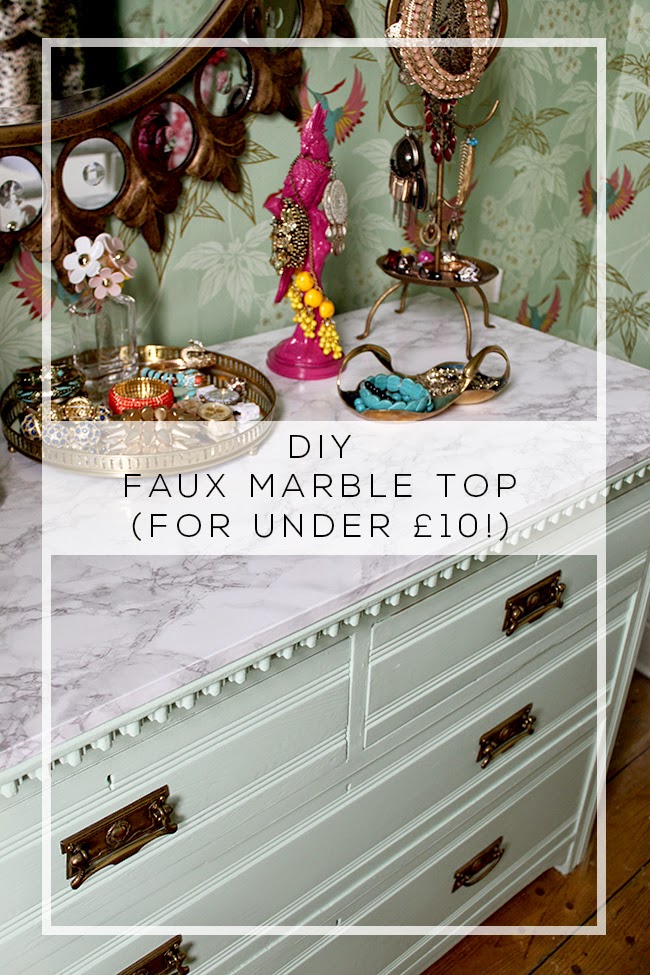
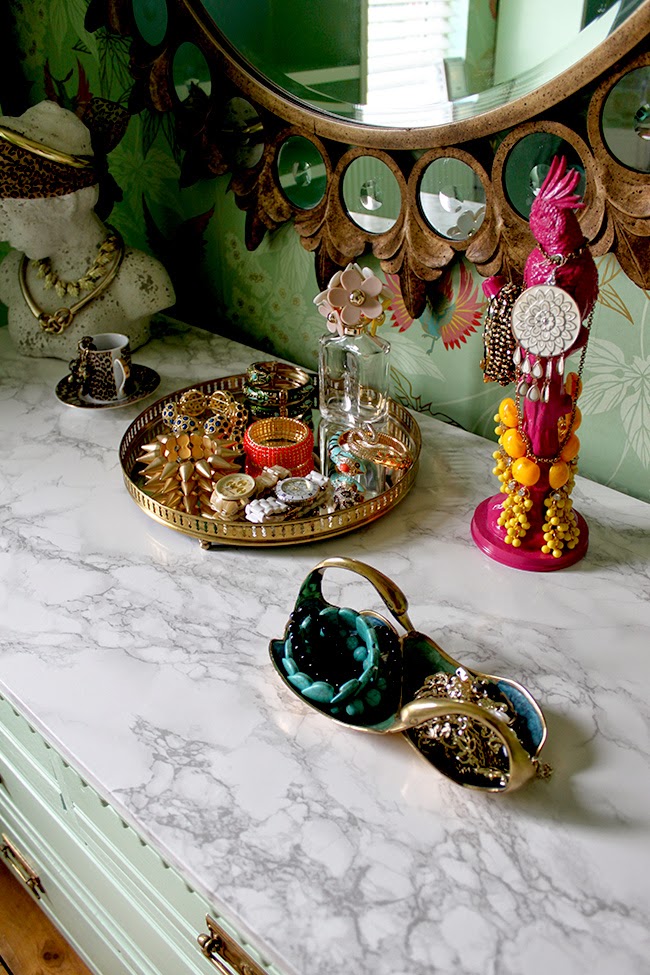
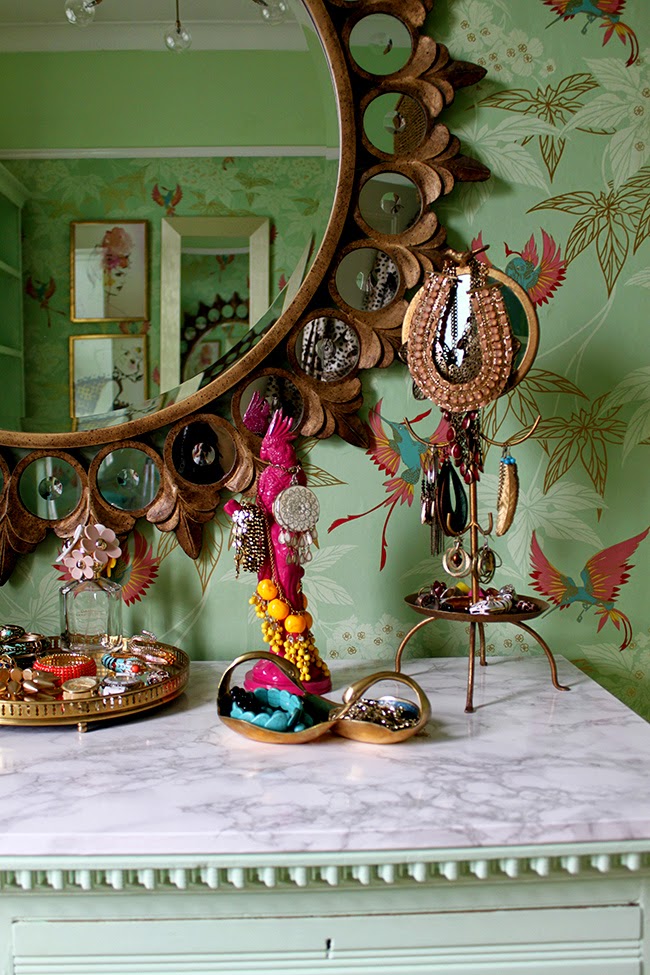
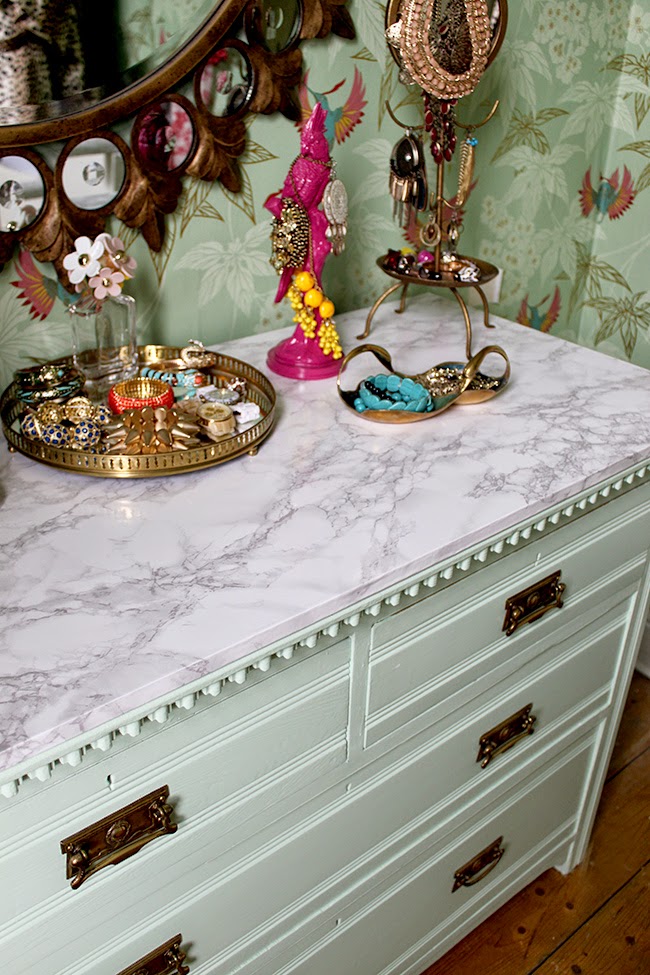
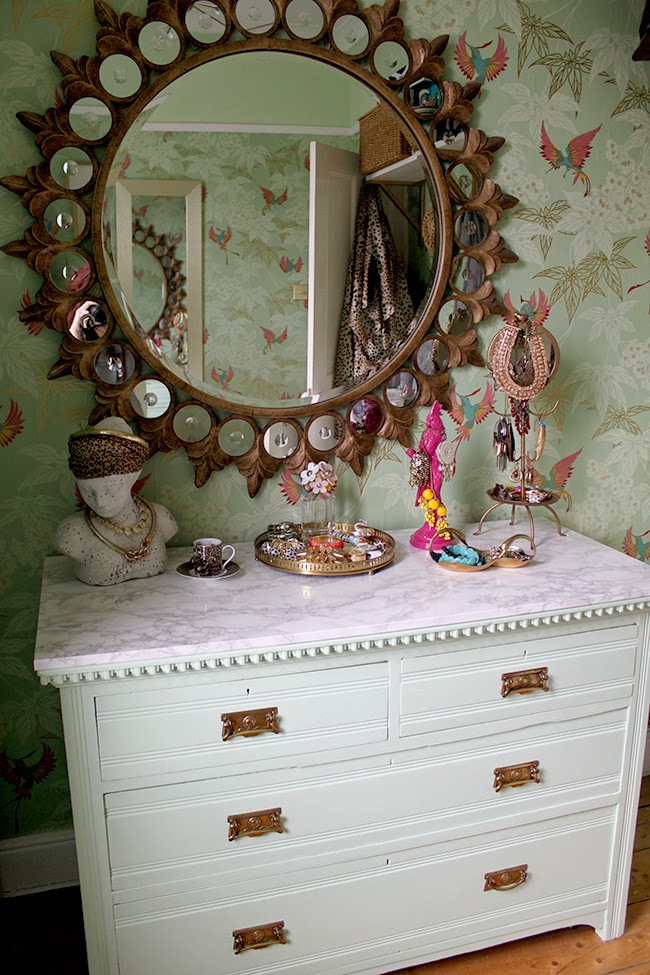
Here’s how my ‘faux marble slab’ looks on top of my chest of drawers.
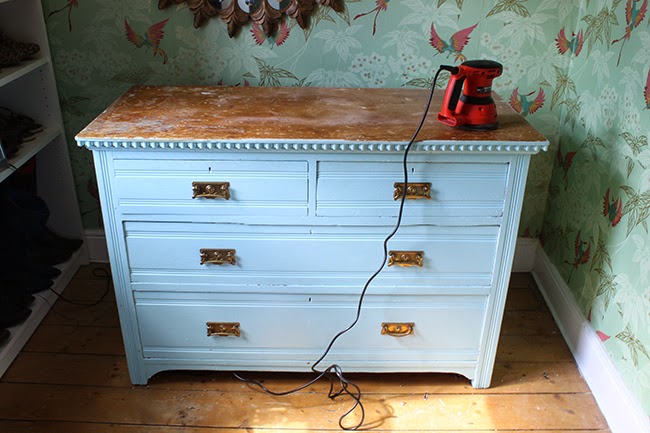
Hard to believe that chest of drawers looked like this not long ago…
Apologies I can’t show you a more ‘pulled back’ picture just yet as the rest of the room is still in a bit of chaos with my Billy Bookcase Hack but you’ll be happy to know the last coat of paint is now drying on the shelving and I’ll be backing them with wallpaper very soon! They are looking rather wonderful already though – can’t wait to share!
So what do you think of my new marble topped chest of drawers? I love that it’s really just a piece of MDF that’s sat on top (it’s heavy enough that it doesn’t move around so I didn’t need to attach it in any way) but if I ever wanted to change it or remove it, I could do so pretty easily. Honestly, for just around £7 with shipping, I’m loving this little makeover! I’ve already ordered more, anticipating the fact that I kind of want to cover my entire house in this stuff…
Any projects you can see yourself using this product? Or perhaps you already have and would like to share? I’d love to hear!!
Good news! My Joss & Main Sale has been extended for an extra day!! There’s still time to get a Swoon Worthy bargain for your home! Easily sign up here.
I’m also on Plume, Joss & Main’s blog, talking about how to get the “Eclectic Boho Glam” look in your home as well as a Q&A with me where I reveal my must-have pick for the season and what I think the next big ‘thing’ in interiors will be :)



i love it! it's so pretty! the faux marble looks amazing!
Thank you Cassie! xx
It looks AMAZING, Kimberly! Funny, just earlier today I saw a cute project using contact paper and I was wondering where to get this in the UK. Glad I know now what it's called here, thanks to you :)
Ha! I don't know why I was searching for the American term, of course the British have to do their own thing! ;) xxx
Wow, that looks amazing and it matches perfectly with the mint!
Thanks Abi! I wasn't sure if the pattern would definitely work but I think it goes rather nicely! :) xxx
Ooh so chic! I love it and the moulding too. Back in spring I did a mini makeover and dud a faux marble honed top on my sideboard. You should check it out! http://www.domicile37.com/2014/05/free-sideboard-turned-chic-sideboard.html
Oh it looks fab! I can't believe what it used to look like, what a transformation! Yes, this stuff is truly amazing ;) xxx
I love it! Especially with that mint! I just ordered some of the exact same contact paper a week or two ago and did a little bedroom makeover with it myself! I'm obsessed with it – dying to cover everything in faux marble lusciousness now!
Oooh yes!! I saw a little sneak peek of that with your rather amazing Remodelaholic post! Can't wait to see all it's glory, they looked amazing – I genuinely assumed they were marble-topped! And a thumbs up from the Queen of DIY is good enough for me ;) Thanks hun – I am already looking for more project for this stuff ;) xxx
Now that brings back memories, I can remember my mum using it and if there was any leftover I used it in my dolls house. It was the best looking dolls house in all of Yorkshire, or so iI thought lol. It looks brilliant xxx
Haha!! I'm sure my mum used it in our kitchen cabinets when I was a kid but it certainly didn't look this swish lol Thanks so much! xxx
This looks amazing! What a fab idea. It looks real!<br /><br />Katie <3
Thanks Katie! It really does look like the real thing, I keep going into the room to 'visit' it hahaha xxx
Looks pretty amazing! ! Great pairing. <br />Maybe a nice accent chair for the room? <br />https://www.etsy.com/listing/199405768/reupholstered-vintage-wingback-chair?
Thank you! Shipping to the UK may not be entirely cost-efficient! Ha! The room is tiny so I have a ghost chair in there at the moment ;) xxx
I love your home so much! Everything you do looks incredible. I read your posts on Plume, and it's funny what you mention as the next big thing… as I just did a post on my blog saying how I'm finding myself going in that direction despite my usual tastes!<br />( http://dinkidots.blogspot.co.uk/2014/08/influences-gold_21.html )<br />The marble top works so well and I can't wait to
Aww thanks so much Maria! You are too sweet! And yes, I did the same about 3 years ago when I realised I was falling in love with brass – I had always only crushed on silver! I started with this room in fact introducing the gold and then slowly introduced it to other rooms – I had mixed metals for a while, it's perfectly okay to do that :) And YES GO FOR GOLD!! hahaha xxx
Absolutely stunning, would never say it's sticky paper! Looks amazing like real marble.
Thanks so much Sharon! It really does look so realistic, I'm completely amazed at the outcome! ;) xxx
IT LOOKS SO GOOD! Like a million bucks! And it's so easy to clean, so no fear, my multi hair product soul sister :) I'm pretty sure it's the exact same contact paper as mine! And I love the British name for it. So, so terribly British. Great work, love! ;)
Oh that's so good to know! That little mirror tray is forever speckled with all sorts of product, its nice to know I'm not the only one who uses a million different things on my hair ;) And yes, t is SO British, isn't it?! I had to laugh when I realised what it was called here! Thanks so much hun and thanks for the inspiration!! xxx
Sooo cool! I need to do this on my desk… I hope this is one of those items that Amazon actually ship to Norway…
thanks for the info! :)
The company is called d-c-fix and it looks like it's manufactured in Germany! So there's a good chance you may be able to find it in Norway! I am actually considering doing this for my desk when we finally get around to the guest bedroom remodel myself ;) Good luck with your search! xxx
AH-MAY-ZING!<br />Denise
Ha! Thanks Denise!! ;) xx
This may be the most amazing thing I've ever seen! Cue me running around our house frantically looking for things I can 'marble' up. Great job!
Haha! I'm doing exactly the same thing, trust me!! ;) xxx
This looks really awesome. I love it. Now I'm wondering what to marble up….. x
I totally love it!!! your dressing room ROCKS!!!
This. Is exquisite. The coffee table in our apartment is currently at an unholy level of ugly. We can't do much about it because it's our landlord's but sticky back plastic = YES. And Burlap and Lace – thank you! I love finding new design sites to creep xx
Stop it! You totally fooled me! Genius.
Brings back memories of terrible rental kitchens with imperfectly applied sticky backed plastic so that there was gross stuff accumulated under the edges.<br />Reading US blogs I am often wondering what some of the terms mean .. TSP, rubbing alcohol, & so on. Perhaps in one post you could set out a list of the translations you have discovered?
Let's hear it for the Sticky Back Plastic!!! lol Wow! That brings back memories… It looks like it's come on leaps and bounds since I last used it. Really nice job, Kimberly :-)
Brilliant post, I am going to buy some of that stuff now and recover the white bit of MDF I use for blog backgrounds, genius idea you had there! xx
So pleased you found it helpful! I have done the exact same thing – covering a bit of white card in it to use as a background for photos! It’s fab, I love this stuff ;) xxx
Hi hun,
Love your dresser! What a transformation! Just a little fyi…This contact paper is also available in am extra wide version (about 90cm) so you wouldn’t have to join any seams :)
Hey Samantha – Oh no kidding?! That must be new because I’d not seen it when I did this project but that’s SO good to know!! Thanks so much for that! :) xxx