Amongst the projects for the bedroom I ticked off last week was getting new lampshades for the bedroom. The zebra shades with my new (old) gold bases was just a bit too ‘bling bling’ for the room but I wasn’t entirely sure what I wanted to go for.
I bought some inexpensive white drum shades at my local B&Q to see how going a bit more subtle could work but it felt a bit blah – I’d gone from crazy to boring in a single step and it really wasn’t working for the room. As I thought about my options, I considered covering the shades in a black and white spotty fabric that I had from ages ago. I made my way to the piles of fabric crowding the cupboard in the guest bedroom to check if it might work.
And then something really cool happened. As I went through my stash, I realised that I had something that would work so much better. I got EXCITED thinking about it and dug around until I held it in my hands and marvelled at it like a prize-winning trout. It was a decorating epiphany – do you get those too? If not, I know, I’m weird, bear with me though.
I had loads of it because I originally had other plans for it’s beauty but ended up not using it in the end and so was waiting for the perfect project to come along. I knew – KNEW – this fabric would work in the bedroom. God, I love when that happens.
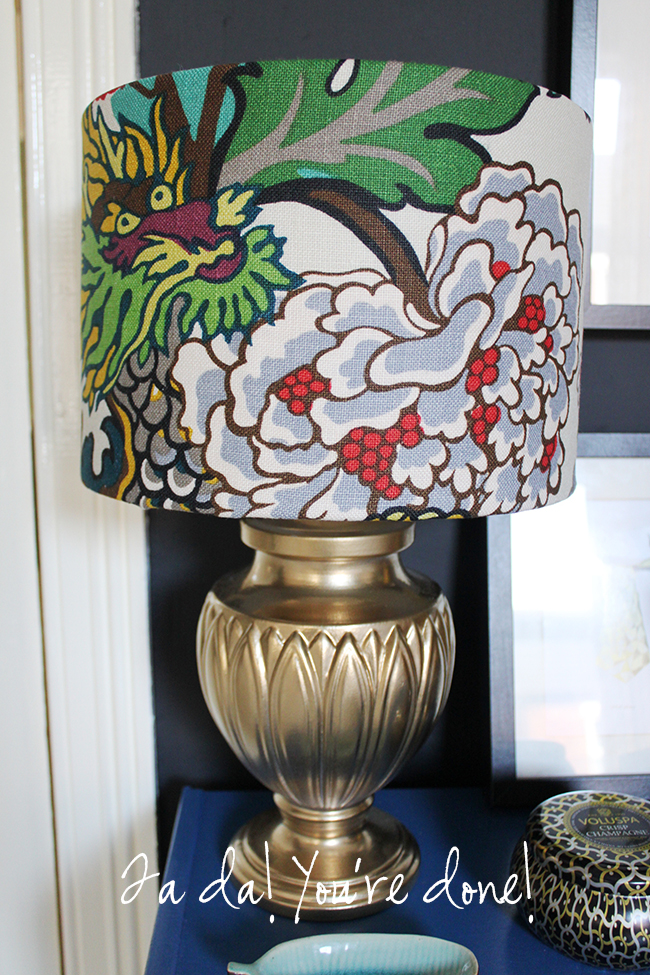
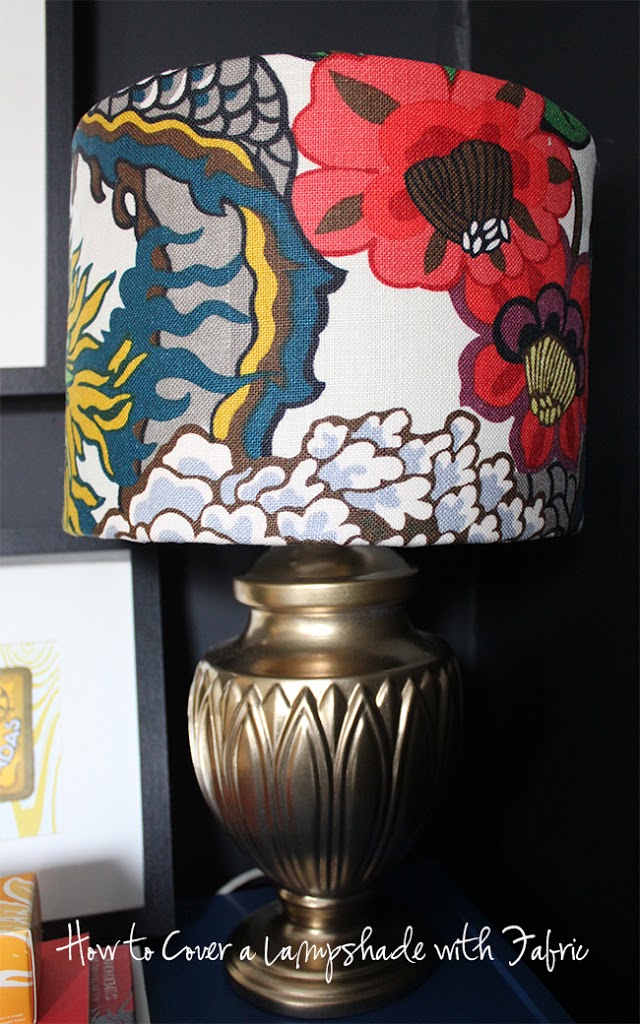
If you haven’t guessed yet, it’s my beloved Chiang Mai Dragon Fabric. Now, I do realise this might be sooooooo 2010 but I don’t care – I still love it and it’s beautiful so yeah, suck it 2010. I’m a rebel. And I have to say, I love how they came out – god I can’t wait to show you the whole room with all the elements – including the Rast hack and the new abstract painting – but you’ll get a little sneaky peak of what I did with the chests of drawers in the end of this post ;)
(Now I KNOW you just scrolled down and looked at the bottom of this post – don’t even deny it. It’s okay, I still love you.)
I looked at a number of tutorials online but my version seemed to work pretty well and I really couldn’t be arsed with spray adhesive (it gets EVERYWHERE that stuff) so I figured I’d share my own version with you in case you decided to try something like this yourself. It was DEAD EASY and only took me about an hour or so to do two shades.
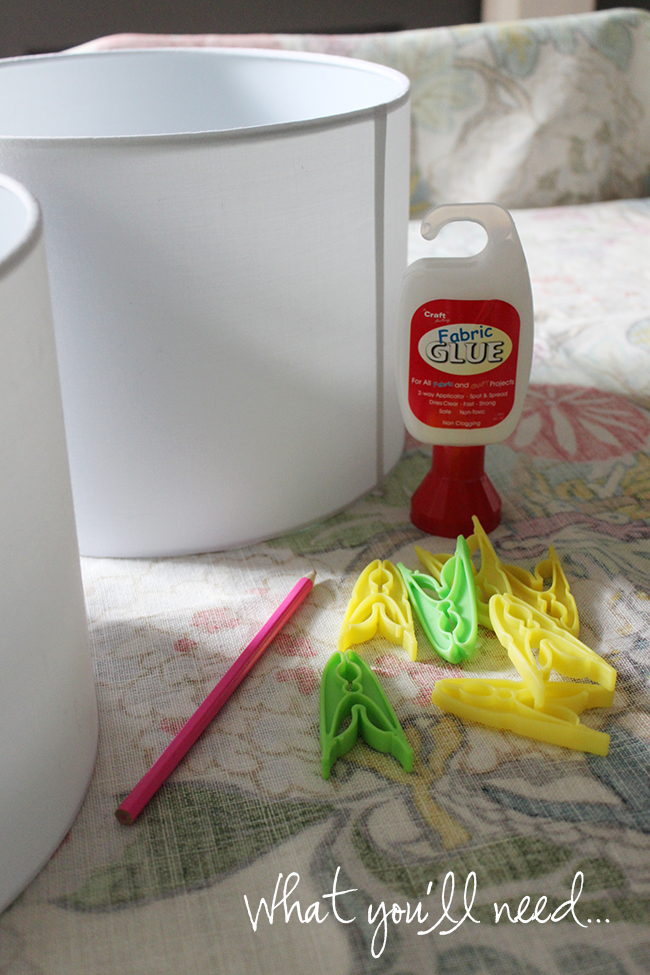
So you’ll need the following:
- A straight drum lamp shade.
- Fabric (make sure it’s enough to cover the lampshade obviously but I used around a metre for both so you don’t actually need loads)
- A light coloured pencil to mark the back of your fabric
- Fabric glue
- Clothes pegs
- Scissors to cut fabric (not shown but make sure they are actually proper fabric scissors, okay? Not ones you cut paper or anything else with – honestly, it makes a difference!)
Here’s how I did it…
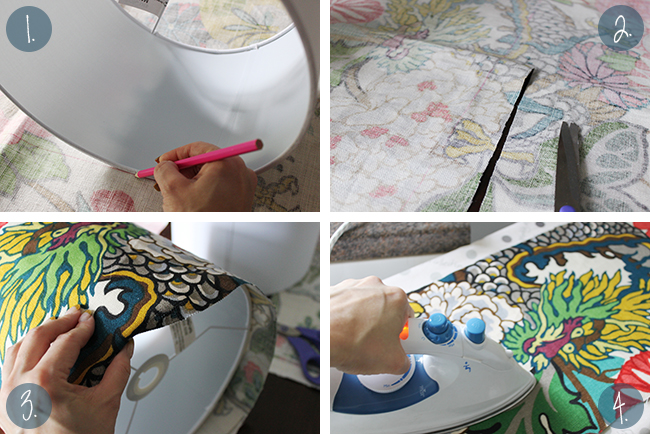
1. First, lay out your fabric right side down and decide what part of the design you want on the front of the shade (obviously if you are using something with a smaller design or a tightly repeating pattern, this step might not be necessary). Full disclosure: I mistakenly eyeballed this step, and as you’ll see later, I somehow cocked it up but it honestly didn’t make that much of a difference. However, if you want to learn from my mistakes, measure around the shade from the front of the shade to the seam and then take that measurement and repeat it, measuring from the middle of your design on the fabric and mark this as your starting spot. Once you have that spot on the fabric, align the seam to it and roll the shade forward, tracing the top and bottom line of the shade until you get to the seam again.
2. If you have a straight drum, you should end up with a rectangular shape on your fabric. You then want to cut out this rectangle allowing around 4mm all the way around it – this will ensure you have enough to wrap around the top and bottom of the shade as well as where the fabric will overlap at the back.
3. Once you’ve cut out your fabric, double check everything was cut correctly by wrapping it around your shade – you should have extra fabric at the top and bottom and where the fabric will overlap. Breathe a sigh of relief that you’ve cut very expensive fabric out correctly.
4. Iron your fabric.
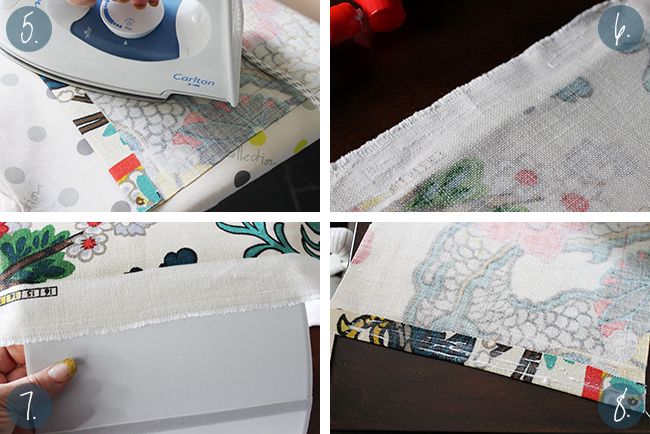
5. Fold over 2cm of one of the short sides of the fabric and iron it. This will be the finished overlap on the shade so you want it to look pretty.
6. Put fabric glue on the other (non-pretty) end of your fabric. I found the glue worked best if I let it sit for around a minute before trying to stick it.
7. As you can see, my eye-balling didn’t quite work out as planned but your shade will if you measure properly in Step 1. Never mind. Moving on. Paste the end of your fabric to the shade making sure it’s straight.
8. Then put fabric glue on the other side of the fabric where your pretty seam is.
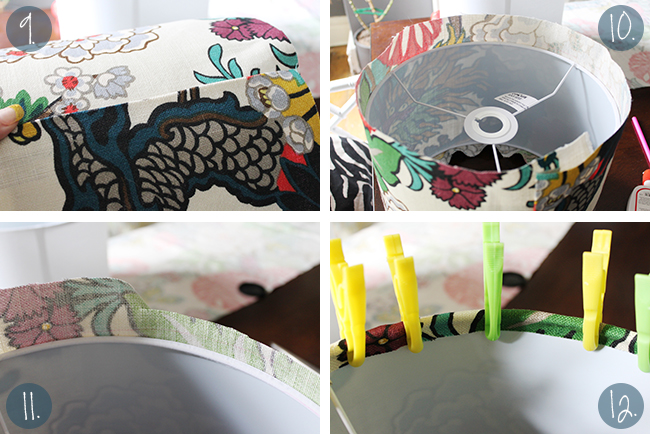
9. Marry up the ends, placing the pretty finished side over the unfinished side and stick down.
10 and 11. Now trim the additional fabric on both the top and bottom of the shade so that you have enough (but not too much) to wrap around the edge of the shade. Spread fabric glue thinly around the entire perimeter of the exposed fabric on the inside of the shade (again, leave for about a minute til the fabric glue ‘takes’).
12. Wrap the fabric around the edge, pinching as you go and use the pegs to keep the fabric down as the glue dries. I found I was easily able to do both the top and bottom of the shade resting the shade on the pegs on the top as I worked on the reversed side. Once the glue is dry, remove the pegs and admire your handiwork.
That’s it! Obviously, if you want to be all fancy and add trim, just give it enough time so that the glue is completely dry until adding with fabric glue again (I might still do this on mine).
So here are the finished lampshades…
And here’s the other one!
So what do you think? Will you be trying this yourself? Maybe you already have and decided on a slightly different method? Do you think I’m stuck in 2010 using Chiang Mia Dragon fabric? Do you want to see the finished chest of drawers now? Go on, the comment box awaits.


Love it! I did something similar some time ago but was stupid enough to actually sew the fabric on, creating way more work for myself, derrr! Great tutorial and that fabric works so well against the dark walls. Well done *patronising pat on the back* ;-) xo
the lamps look great! I still find this fabric pretty classy, especially if you put it in small amounts like you did! thanks for the tutorial.<br /> Ahhhh, and is that blue I'm seeing? yes we want to see more!
Great designs never date – Chiang Mai is a classic! Love these lampshades…
Just so you know, I DIDN'T skip to the bottom photo. But I so wanted to. The shades are awesome. I love the Chiang Mai fabric as well, and this is an absolutely perfect place to use it! You can rest now that you know you have my approval on your lampshades, right? haha<br /><br />Liking the blue on the nightstands too!
Oh yes you did! Love love love it!!! My little dragon will always look good and you nailed it girlfriend! Bravo!
You clever girl! Love the Chiang Mai shades in your bedroom! xx
SOOOOO cool! Love it!!! Love the fabric too. Can't wait to see the entire room revamp ;-)
I love this idea, so simple but beautifully effective xx
Yep, they are totally fab. I'm so not ready for chiang mai to be out of style, so I think we should officially declare it timeless. Done.
Nice job, I love it!! Such a great way to personalise a budget lampshade, look amazing!
Just followed your tutorial and cant believe how easy it was! Thanks!
I just wanted to chime in and say that it is now 2015(almost 2016) and I would still kill for a good deal on that beautiful, timeless fabric! It will never go out of favor! This is the perfect way to use it. Small, impactful doses. Though, I don’t think there can ever be too much of a good thing. Love your style and your blog!!
It is such a timeless fabric, isn’t it? I still love it too ;) Thank you so much, so nice of you to say! :D xxx